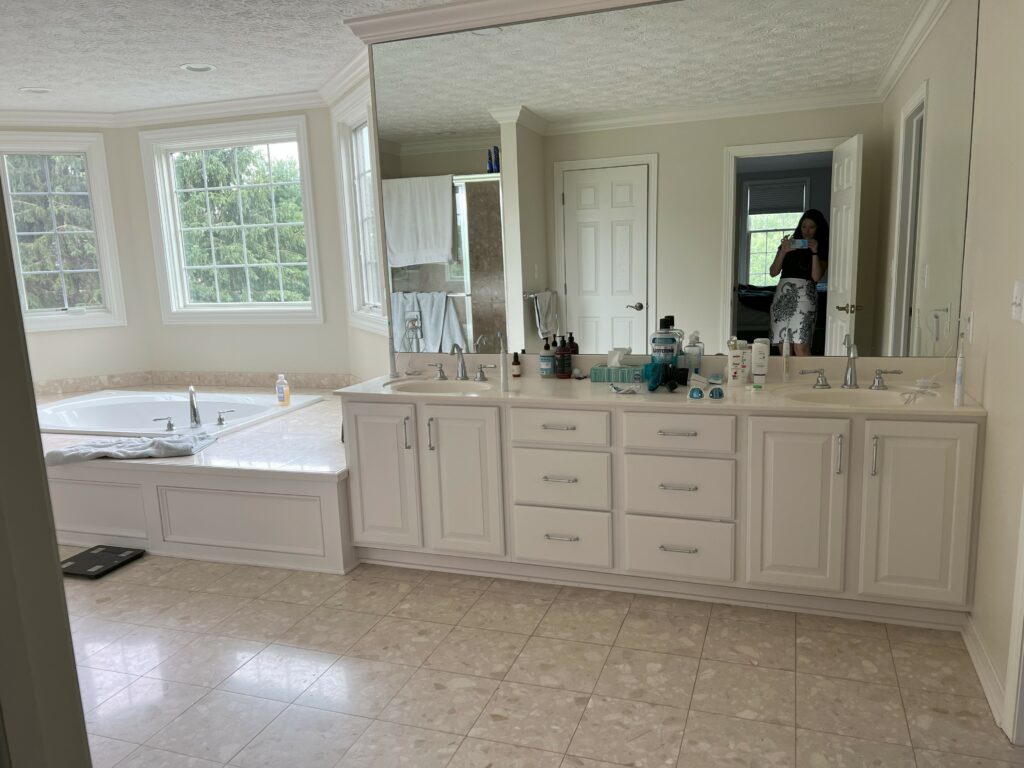
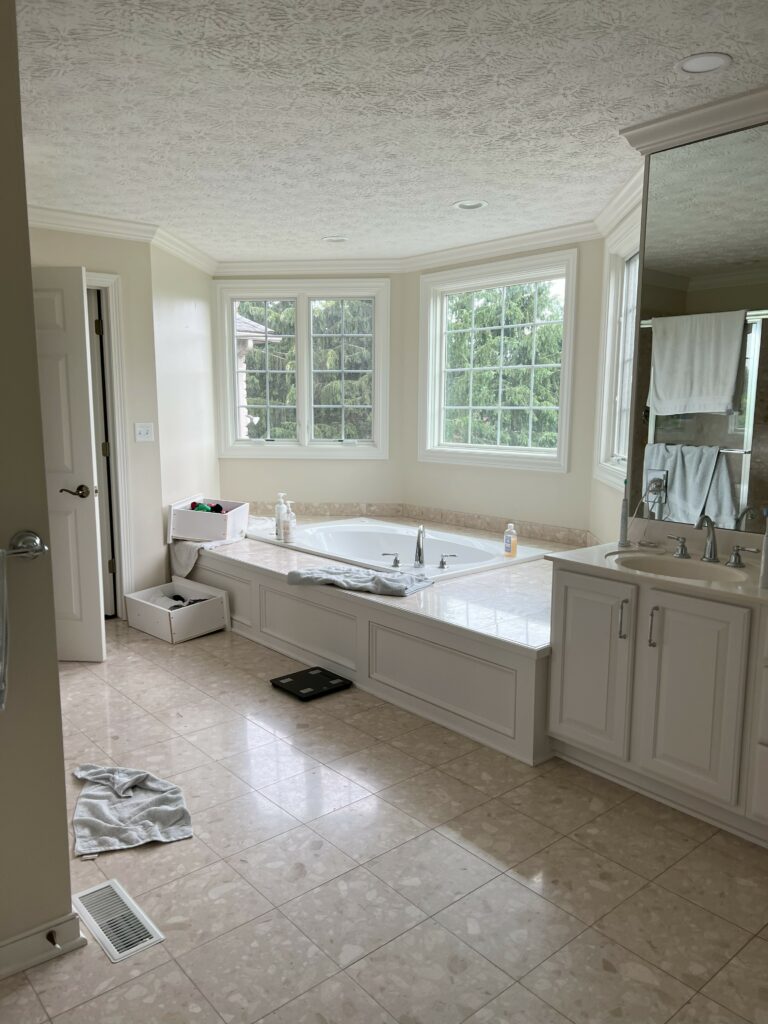
This giant bathroom just didn’t function well for our clients. The vanity was low, the storage wasn’t up to par, the tub deck took up half the room, and the shower was too small. We transformed it into a tranquil, spa-like space with lots of detail.
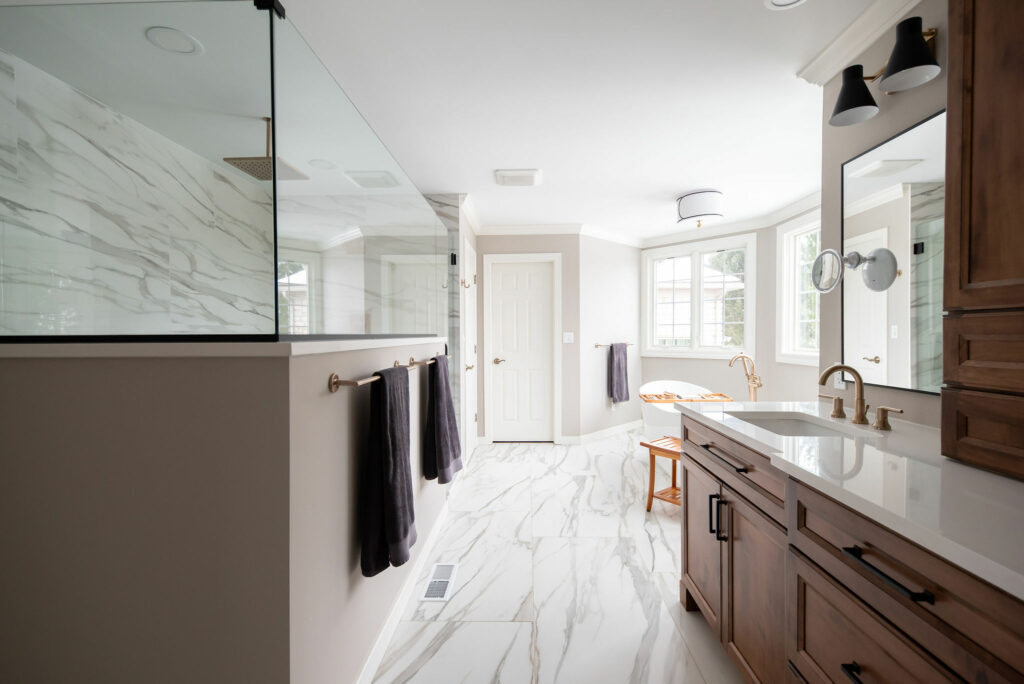
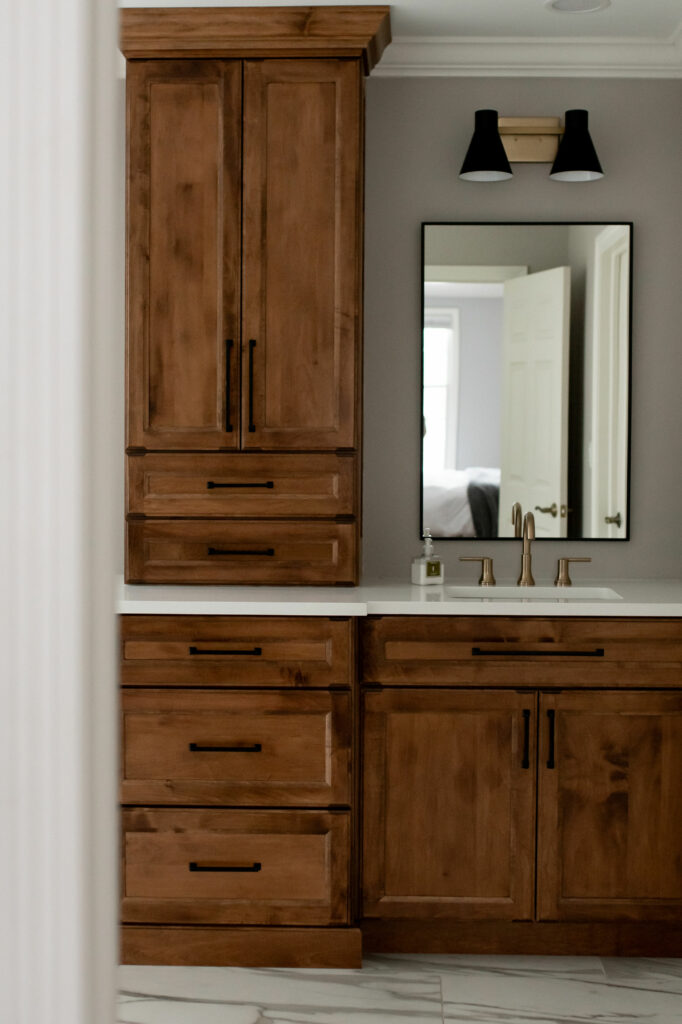
The After features beautiful stained maple cabinets with a storage tower in between the sinks. Yes, these can be outdated if done incorrectly, so let me give you some hints. Take the tower up to the ceiling. Make sure the tower is sitting on the counter, not floating randomly above like an upper kitchen cabinet. And select angular sinks and mirrors to flow with the angled cabinet lines.

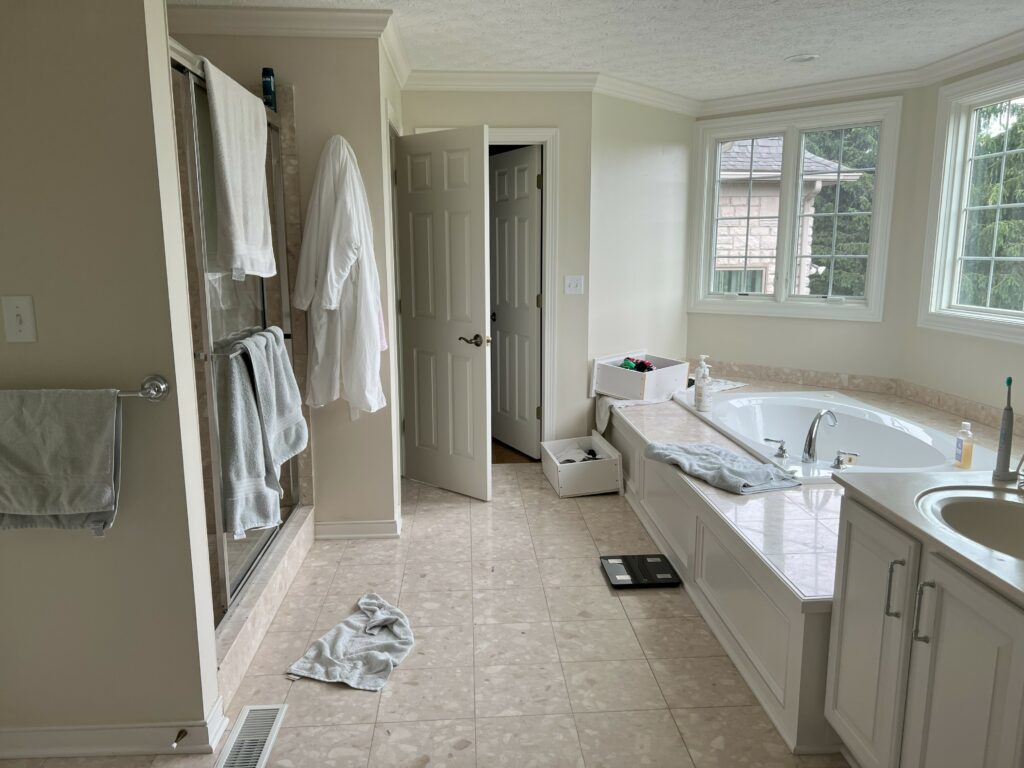
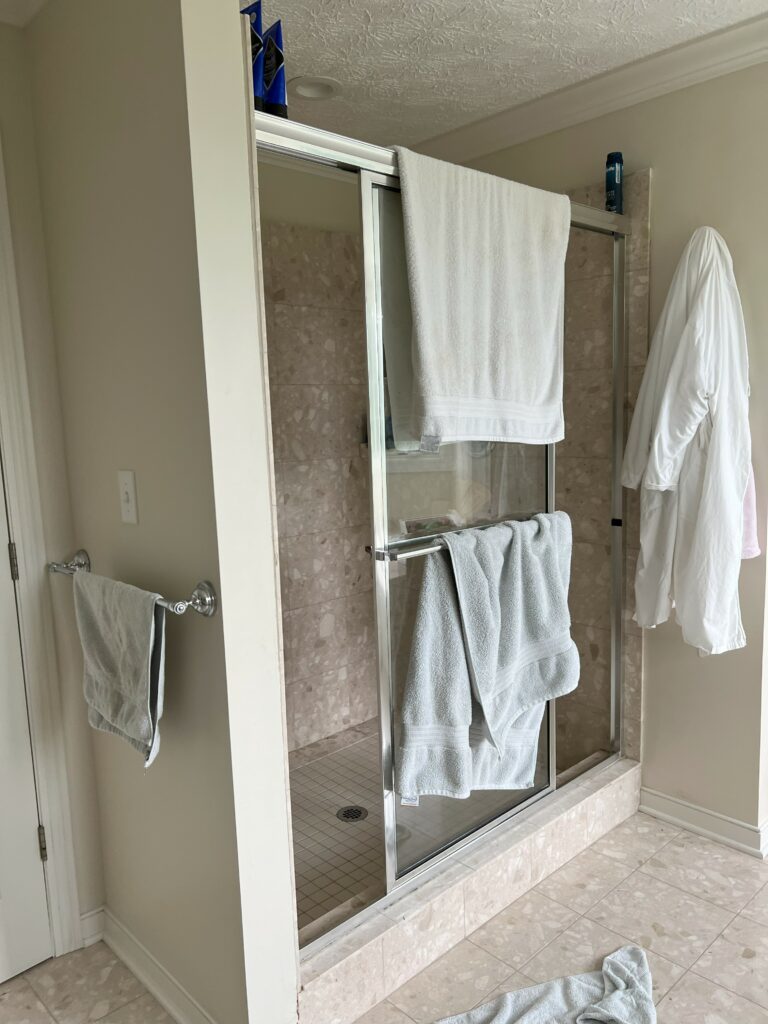
Here’s another view of the Before.
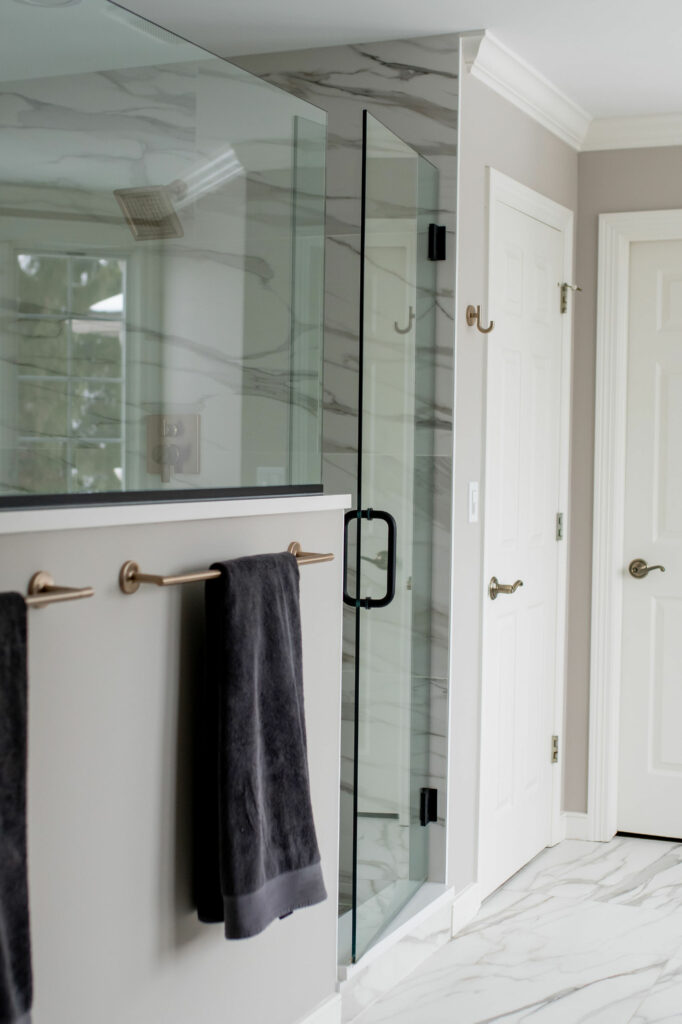
And here’s the After, with way less tub deck and way more shower.
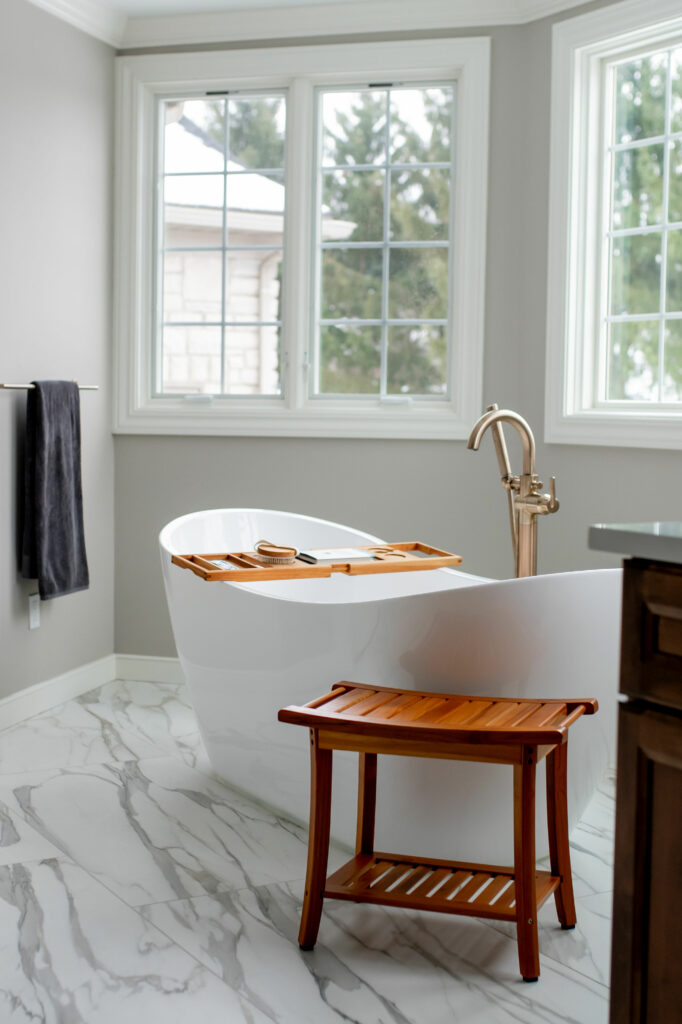
I’m not sure why people were obsessed with enormous tub decks back in the day. This thing had so much extra tile surface, you could have had a picnic by the tub. Why anyone would ever want to do that, I have no idea. So we ripped that all out. And we added a LONG pedestal tub for our tall clients to luxuriate in peace and quiet!
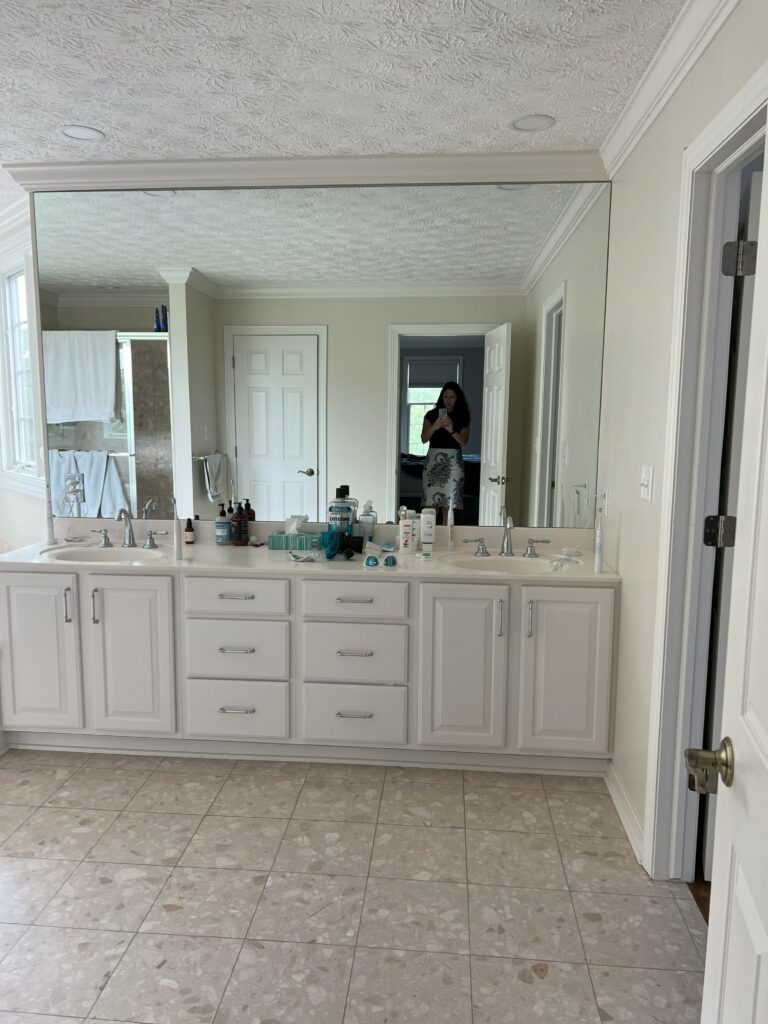
The GIANT mirror also went bye bye. We added separate mirrors for each vanity, as well as more vanity lighting. All that was there before were the two overhead recessed lights, which weren’t exact the msot functional for shaving or applying makeup.
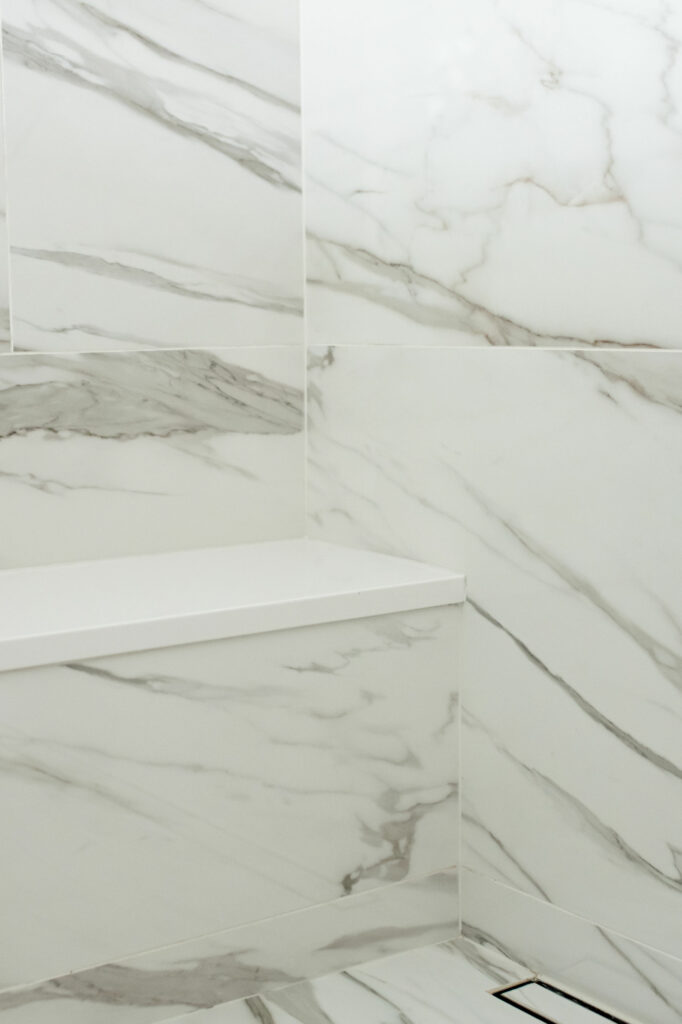
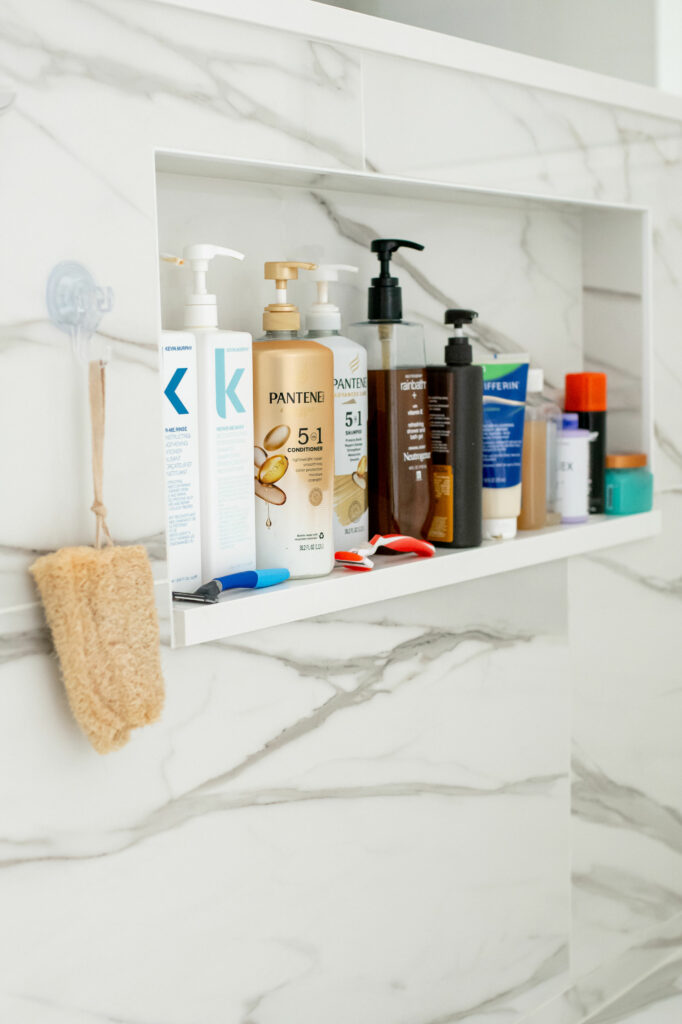
The shower remained essentially in the same spot, but we significantly increased its size. To keep grout lines to a minimum, we selected large-scale porcelain tile that looks like marble but is WAY easier to maintain. We also took that tile throughout the bathroom for a spa-like feel.
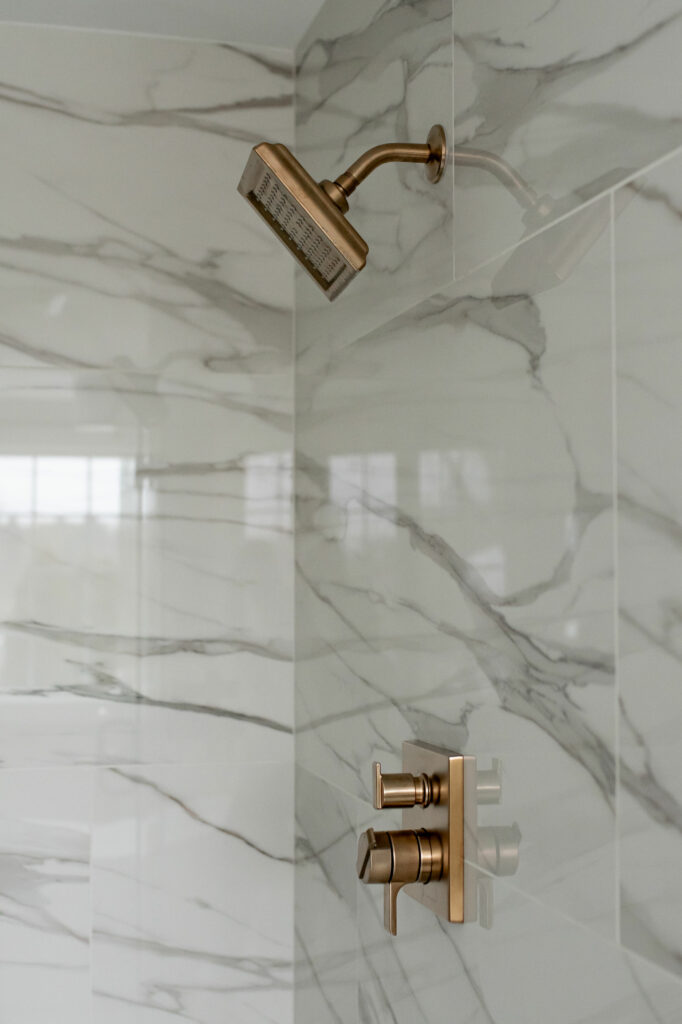
How do you get a drain to work with large-scale tile? Instead of a round center drain, you use a linear drain and slope the tile so it drains toward the drain side. It doesn’t take much of a slope, but it does take an experienced tile setter to do this correctly. Don’t skimp on experience to save a couple bucks – the last thing you want is standing water in your shower.
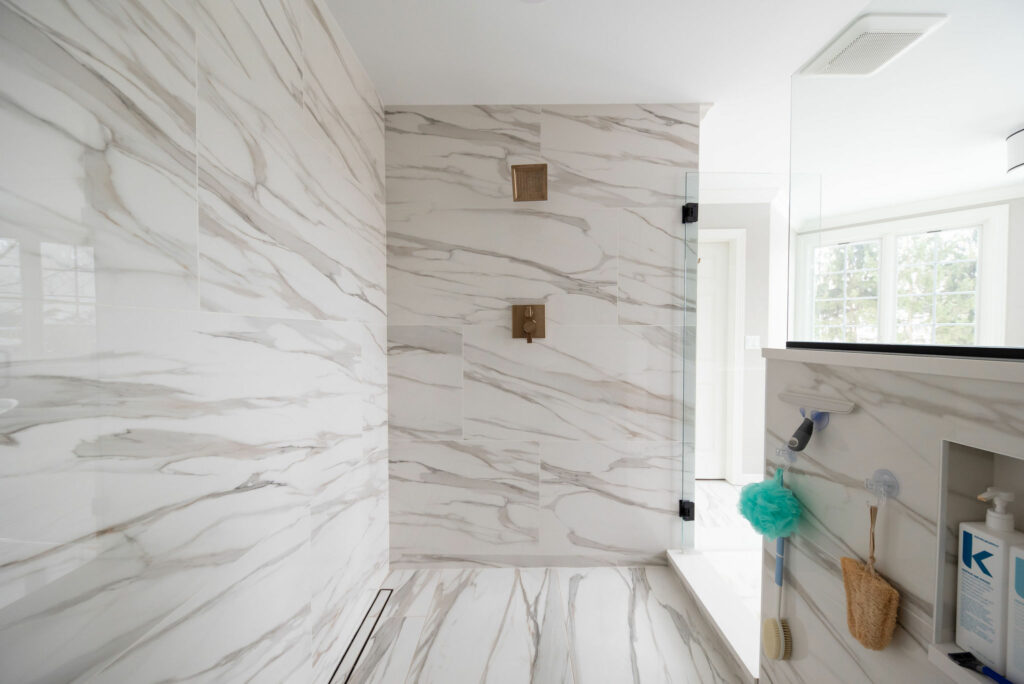
We also added a bench and a very long storage niche for all kinds of bath products.
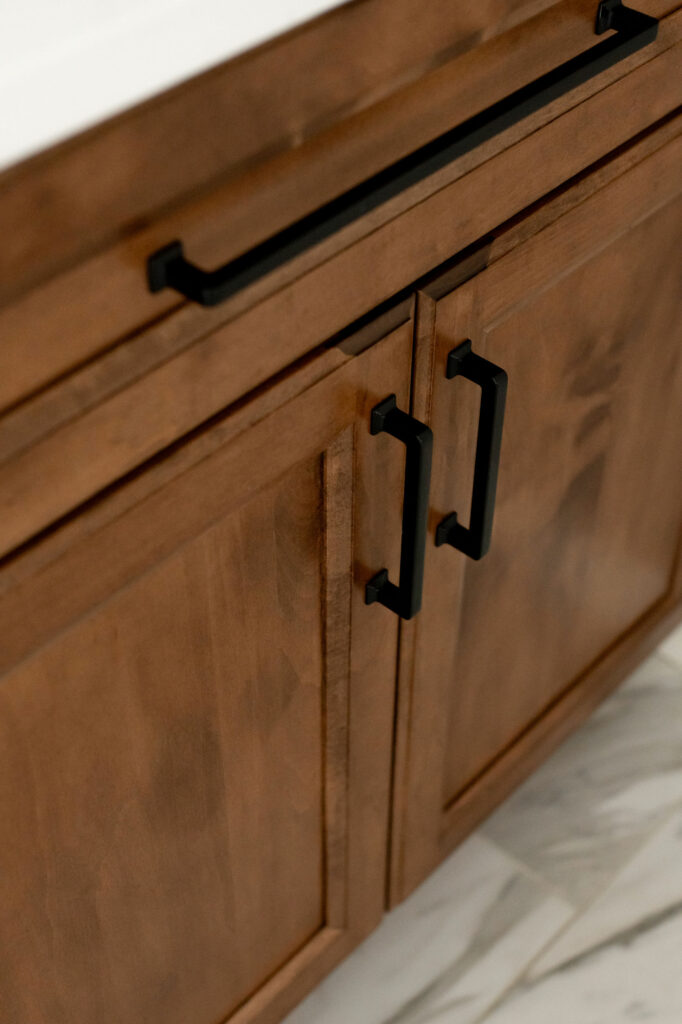
Let’s talk details for a second. We selected brushed brass plumbing fixtures to flow with the taupes and browns in the porcelain tile. To keep everything from being too matchy-matchy, we went with black hardware on the maple cabinets. The black hardware contrasts nicely with the warm tones of the maple.

We then brought more black in with the mirror and vanity lights, which feature a mix of black and brass.

Need to update your bathroom? Contact us to schedule a Discovery Call!