
Here’s the story of my master bathroom’s transformation from gross to gorgeous!
My master bathroom was hideous. Truly. The “before” photos don’t capture the extent of the gross, peeling ceilings. Or the shower door track – the grime and nastiness in that thing is the stuff of nightmares.
But more than just the aesthetics, the bathroom didn’t FUNCTION well for us.
The ridiculous tub took up half the bathroom, yet wasn’t long enough for anyone to actually soak in.
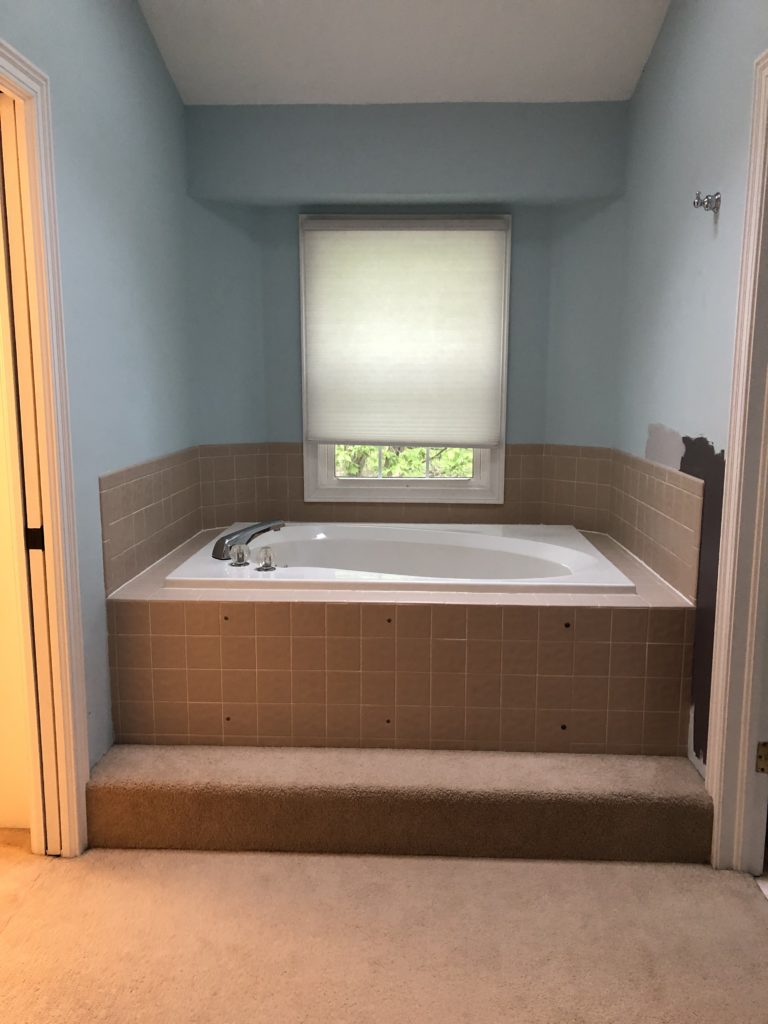
Giant platform. Tiny little diagonal tub. If you could see how sloooowly the faucet filled the tub, you’d get the full unpleasant experience. By the time the tub filled, the water in it was already getting cold.
And of course, lest I forget the CARPETED stair! SOOOO practical for a small, splash-hungry child. Loved it. (Insert giant eye roll here.)
If you’re wondering why the heck there are purple paint splotches on the right wall, they’re from an earlier attempt at decorating the adjacent bedroom. I once had the walls purple. It didn’t work out so well, so I switched to dark blue. (I know, I know. A true shocker for me…but I do so love a blue bedroom!)
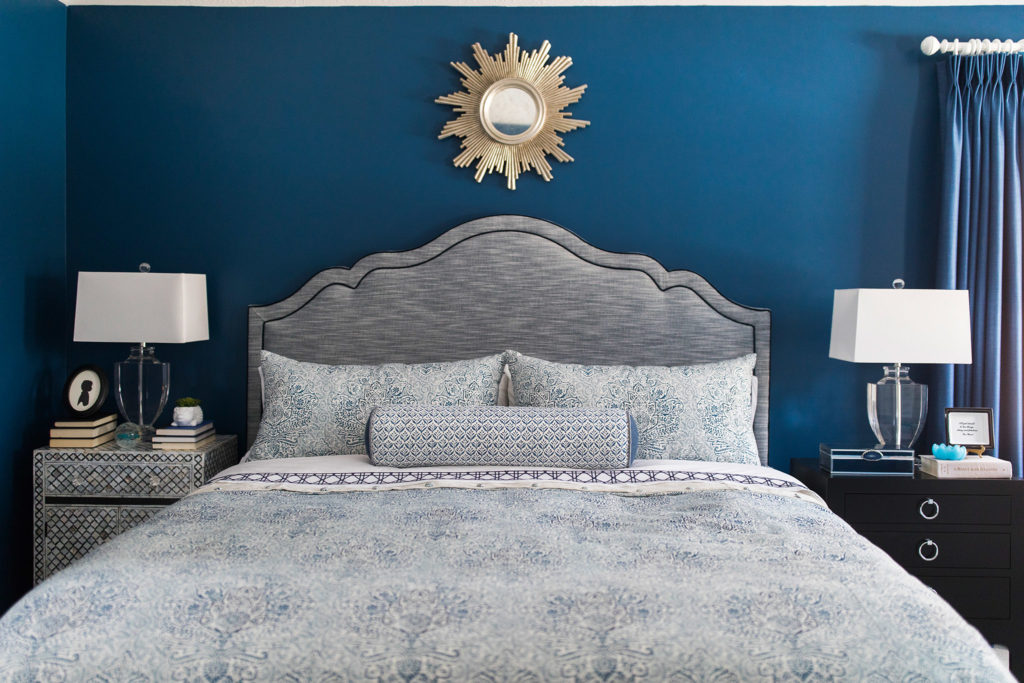
Actually, seeing the adjacent bedroom will help you understand some of the design choices in the bathroom. Let’s take a small detour…
There’s a mix of black and white in the furniture and lighting.
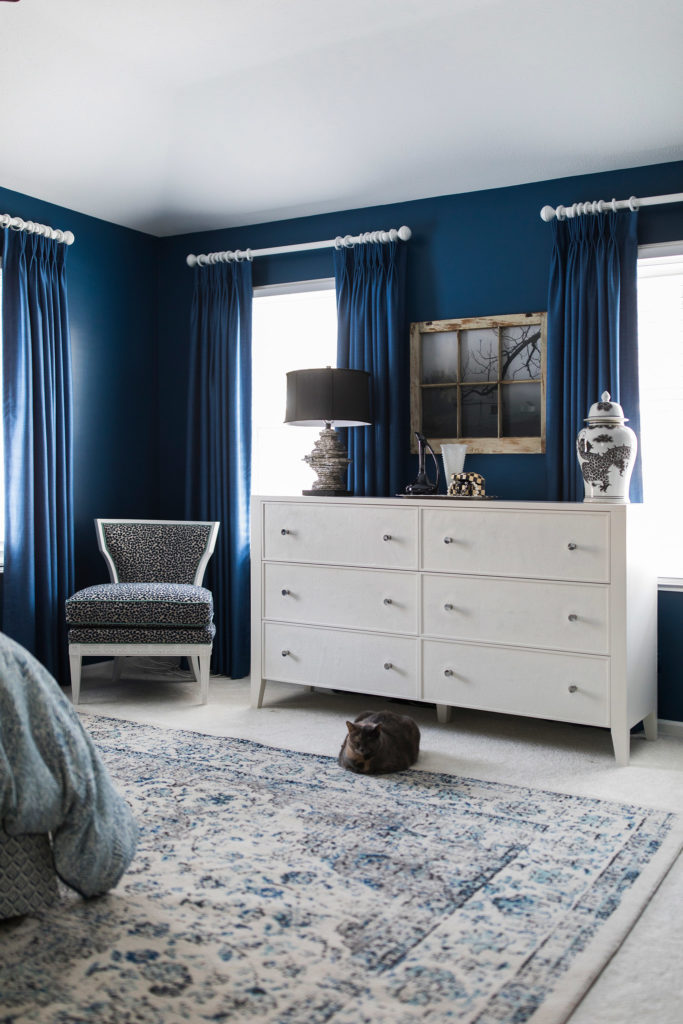
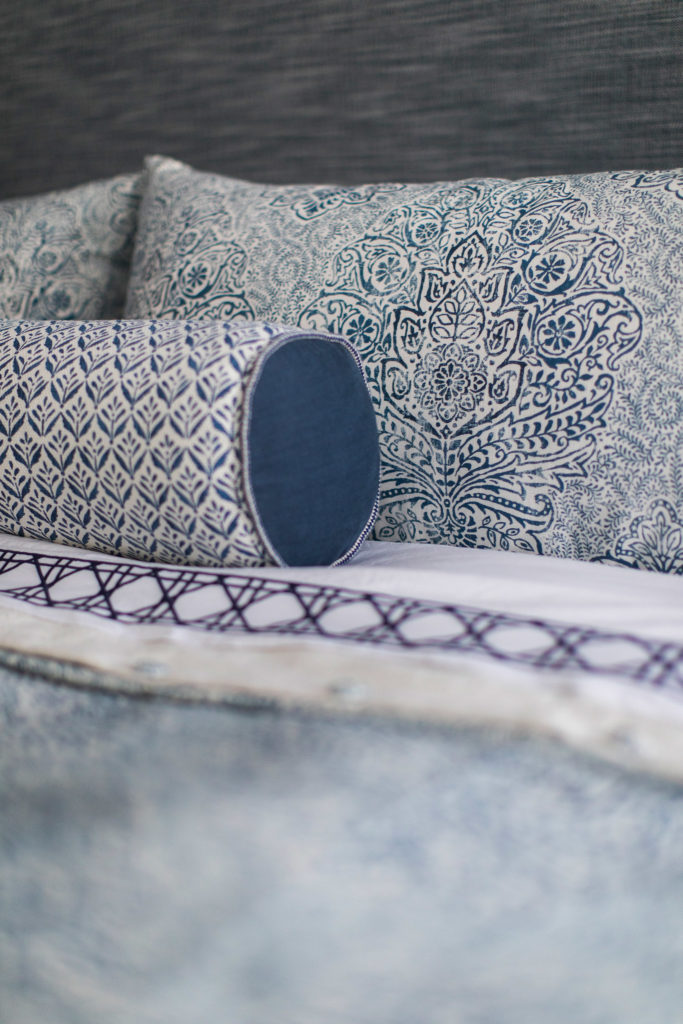
And the bedding is a mix of blues and whites.
The goal for the bedroom was CALM and TRANQUIL, which for me means “blue and white and not tons of other colors going on.”
Ok, now that you understand the adjacent design, let’s dig back into the bathroom, which has a similar mix of white, blue, and black.
Next up on the “OMG this is so fabulous, I’m so jealous” panel is this amazing tiny shower. I’m 5’6″ tall and I couldn’t shampoo my hair without my elbows banging on each wall. Imagine how my 6’3″ husband fared…
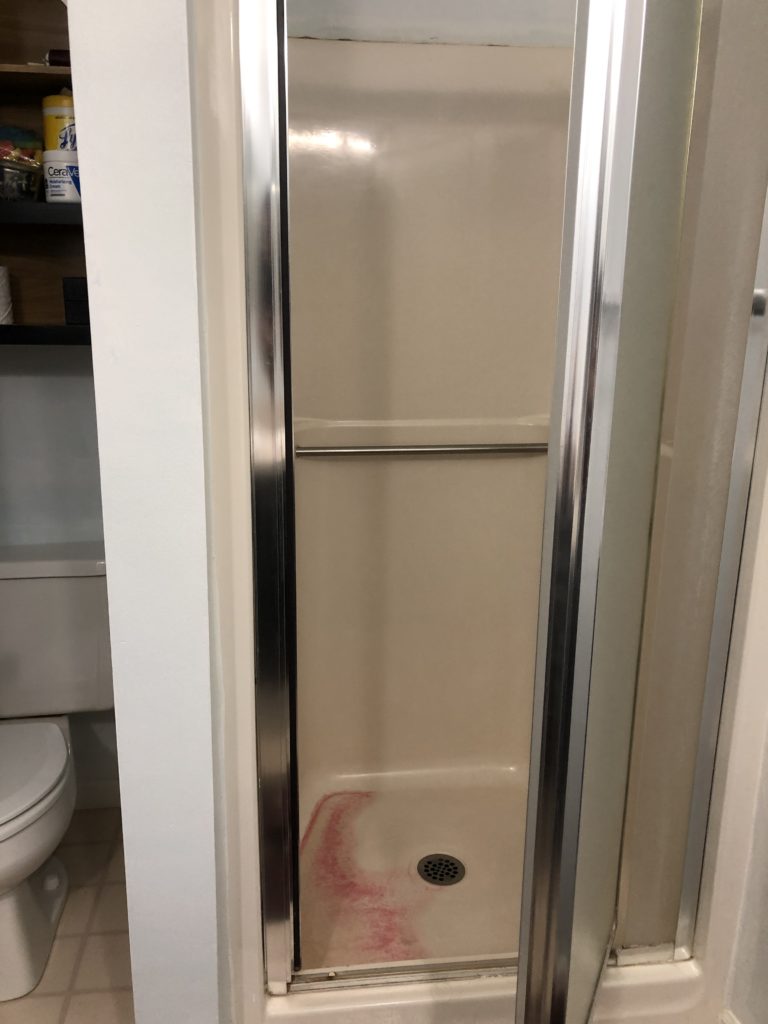
I promise, no one was murdered in there. The basin leaned to one side and water would pool. I might have dyed my hair at home during the quarantine. The dye might have all pooled to one side and stained the shower basin. Gross, I’m well aware. But what’s even grosser is that shower door track. Don’t zoom in. You’ll traumatize yourself.
The best thing ever though? The peeling ceiling.
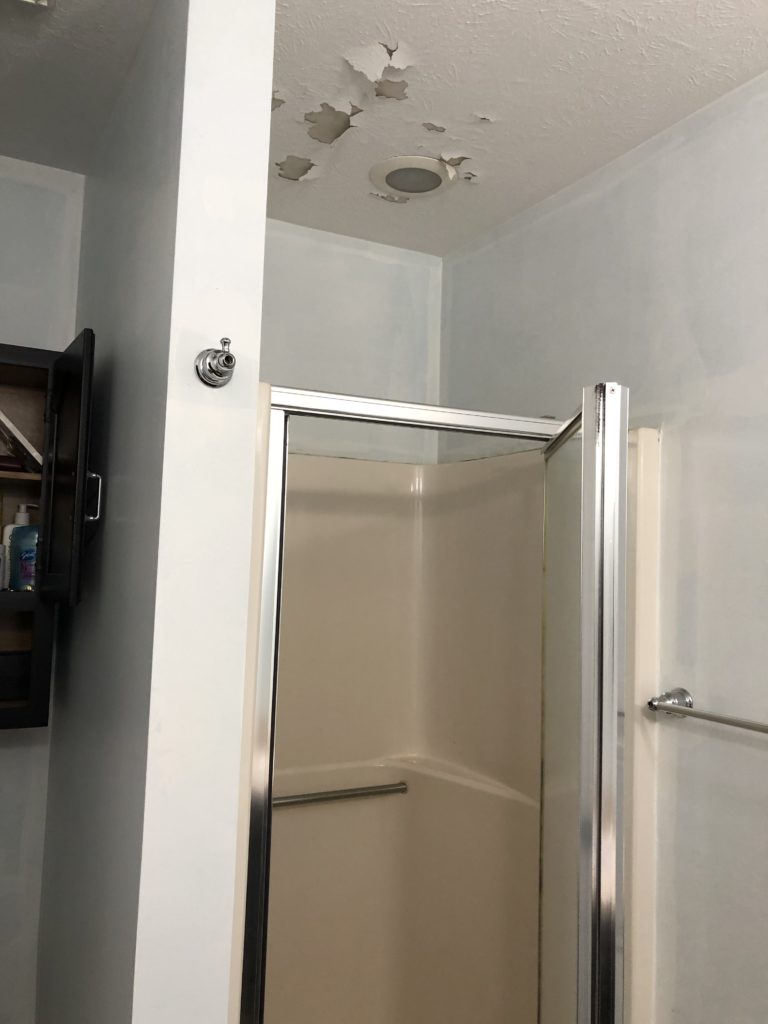
It was fun showering in a small tube, awaiting random ceiling flakes to fall on your head. It’s like the world’s worst lottery.
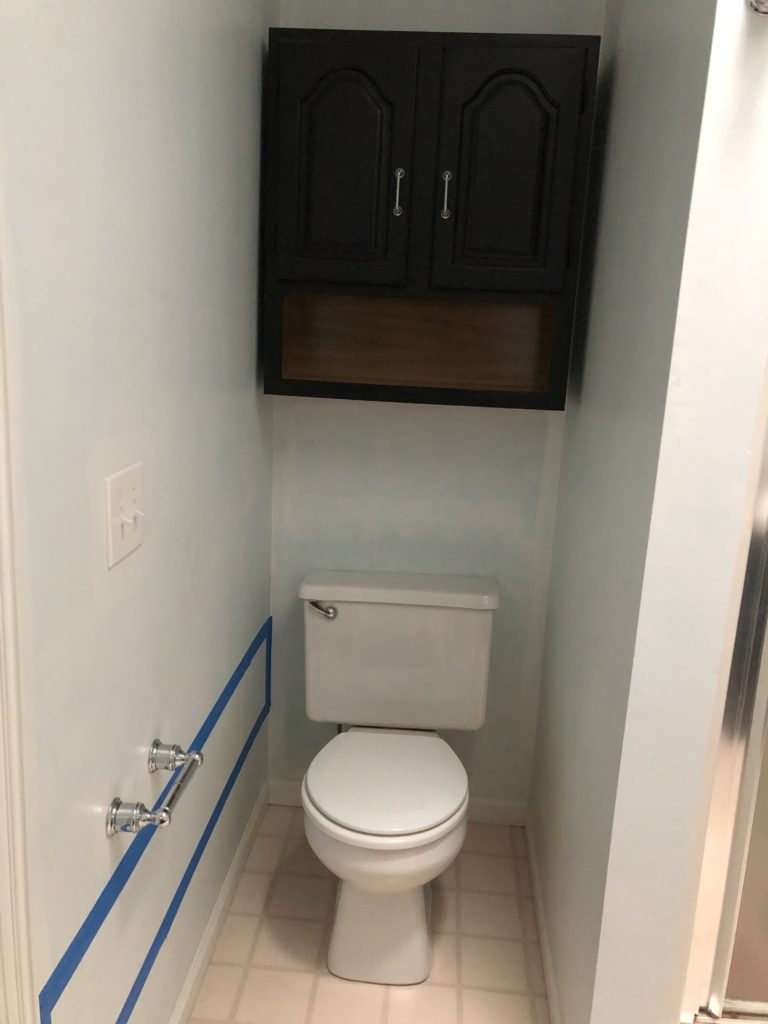
The toilet was a toilet. It was in a dumb spot, but otherwise it worked like any other 1980’s toilet: slowly and with way too much water.
Do you like the pink linoleum floor? Pink is personally not a color I use in my own decor. I love it for others, but it isn’t in my go-to palette. And it had to go.
Lastly, the vanity.
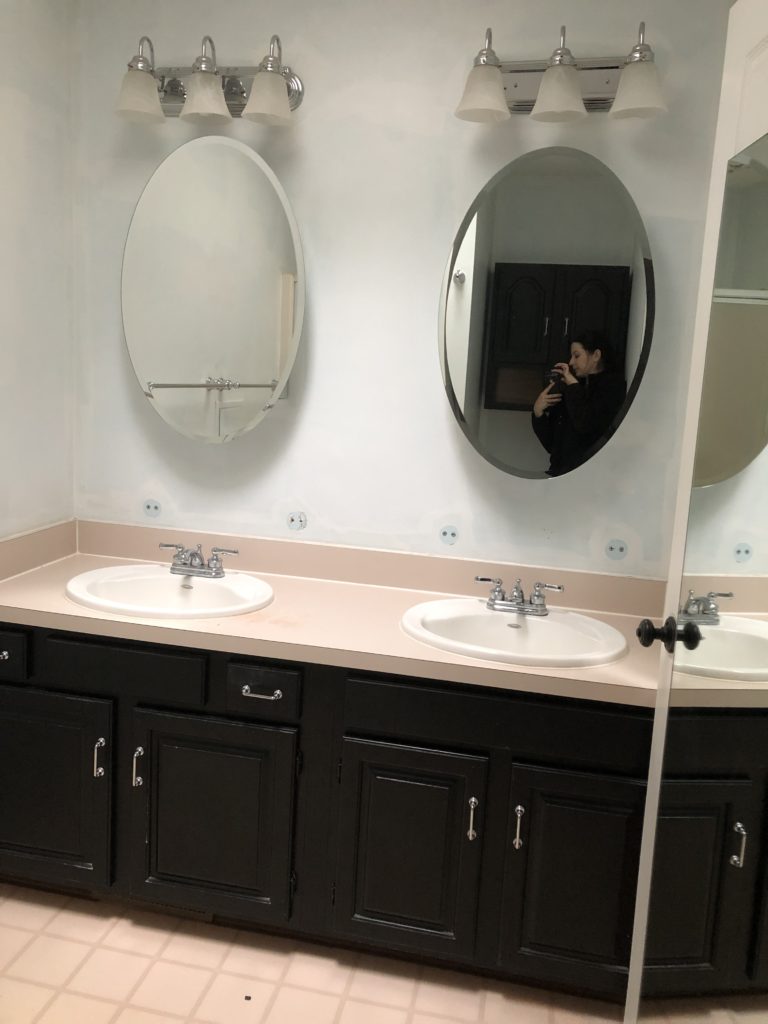
See that tiny little drawer? There were two of those. That was ALL of our drawer space. The rest of the storage was in two cavernous pairs of cabinets. It was NOT efficient and I hated stacking crap under there. (I’m a huge efficiency person and we had EIGHT drawers at our last house, so this was an un-fun change for me.)
The medicine cabinet mirrors stuck out from the wall. I like having medicine cabinets, but I hate the kind that stick out. There’s a perfectly good wall back there that cabinets can be recessed into.
One last thing. It’s not obvious from the photos, but the half of the bathroom with the giant tub has a nice vaulted ceiling. The other half of the bathroom had a flat ceiling. There was zero structural reason for the different ceiling lines. It just made the half of the bathroom with the shower that much hotter, since the steam had nowhere to go (well, except into the really old, really loud REALLY crappy fan that vented to nowhere. Yes, it vented into the attic, instead of outside. No, that’s not supposed to be a thing, but welcome to 1980’s construction!)
Back to the construction process. The bathroom had to be all ripped out down to the studs. The non-pretty-but-very-important “technical” parts of the project take a long time if you’re doing them right.
Bye bye, wall!
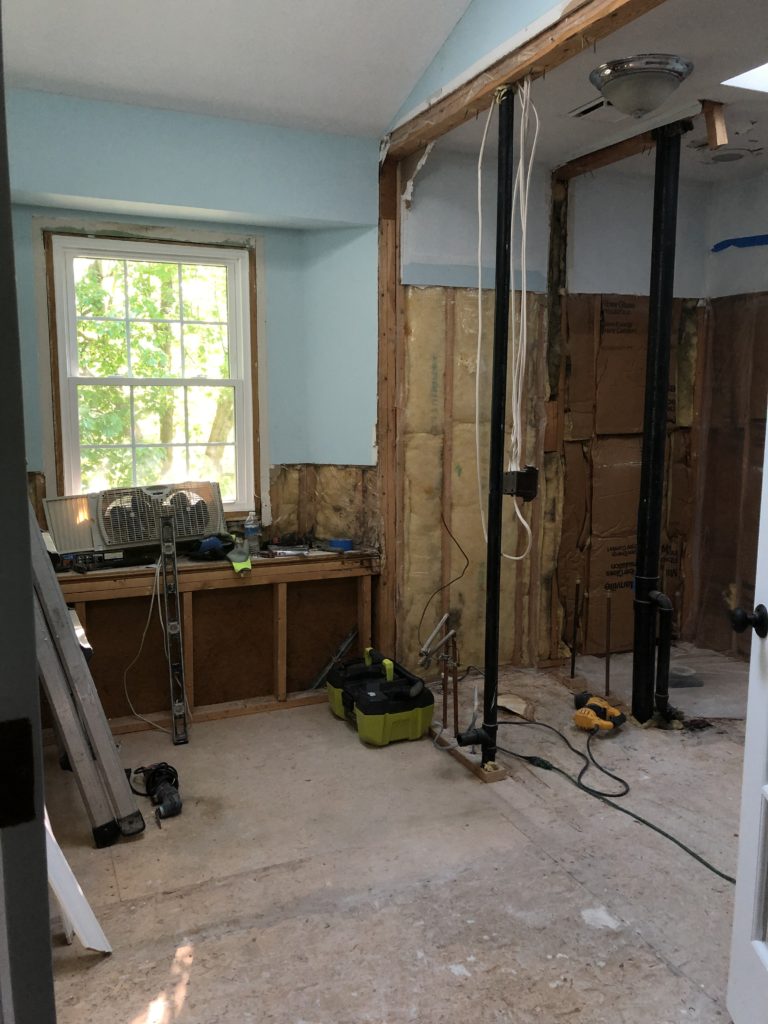
Not gonna miss you, gross shower!
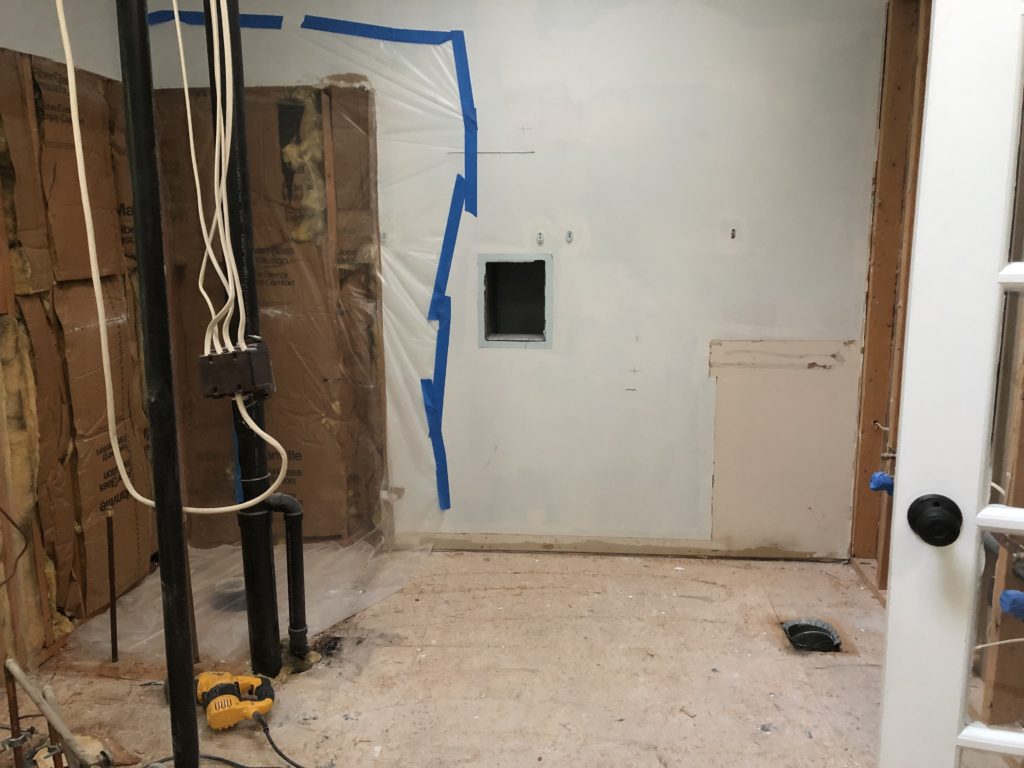
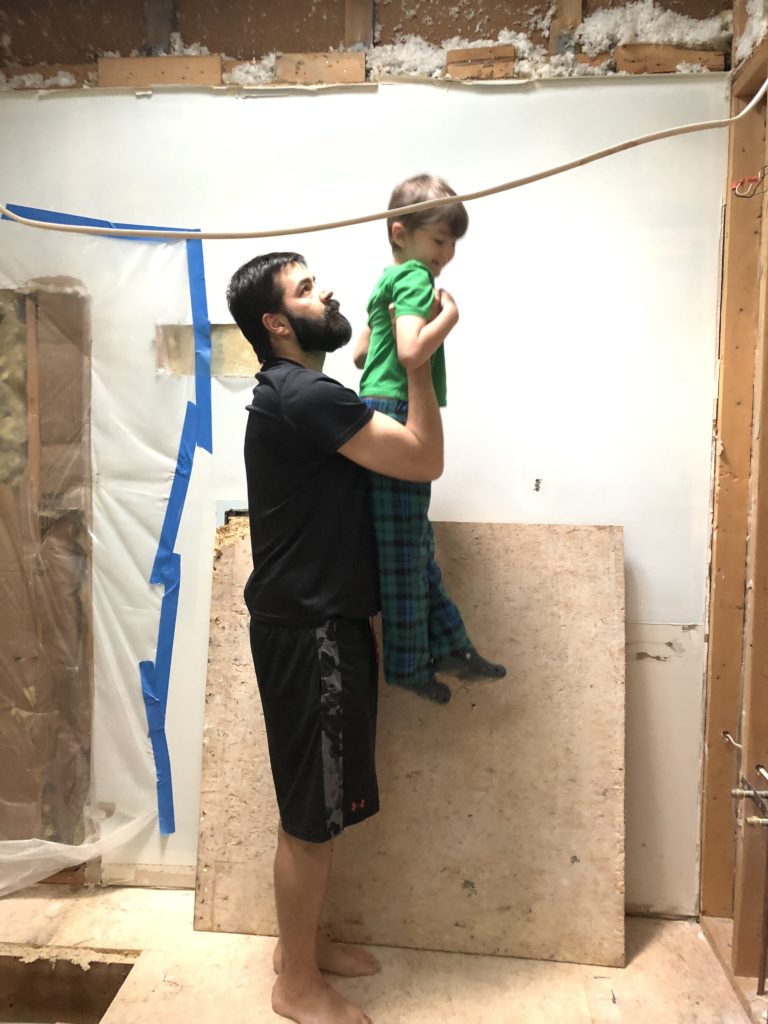
The “technical stuff” included moving plumbing, rewiring electrical, moving HVAC, laying new sub-floors, fixing some rotten wood on the windowsill, raising the ceiling, drywalling, and putting in the underlayment for the shower. I have a bunch of photos of this part, but they’ll bore you…so here are two.
Oooooo, marvel at the open ceiling! (And that quarantine beard!)
Isn’t that new drywall just so stunning?!?! I sure found it exciting!
All of this unpretty stuff takes about 4 weeks. We had one trade in every weekday, with zero delays and zero mess. I hate mess, so this was very good for me. And this was during the spring and summer of 2020, folks, so LOTS of chaos was going on elsewhere in our lives!
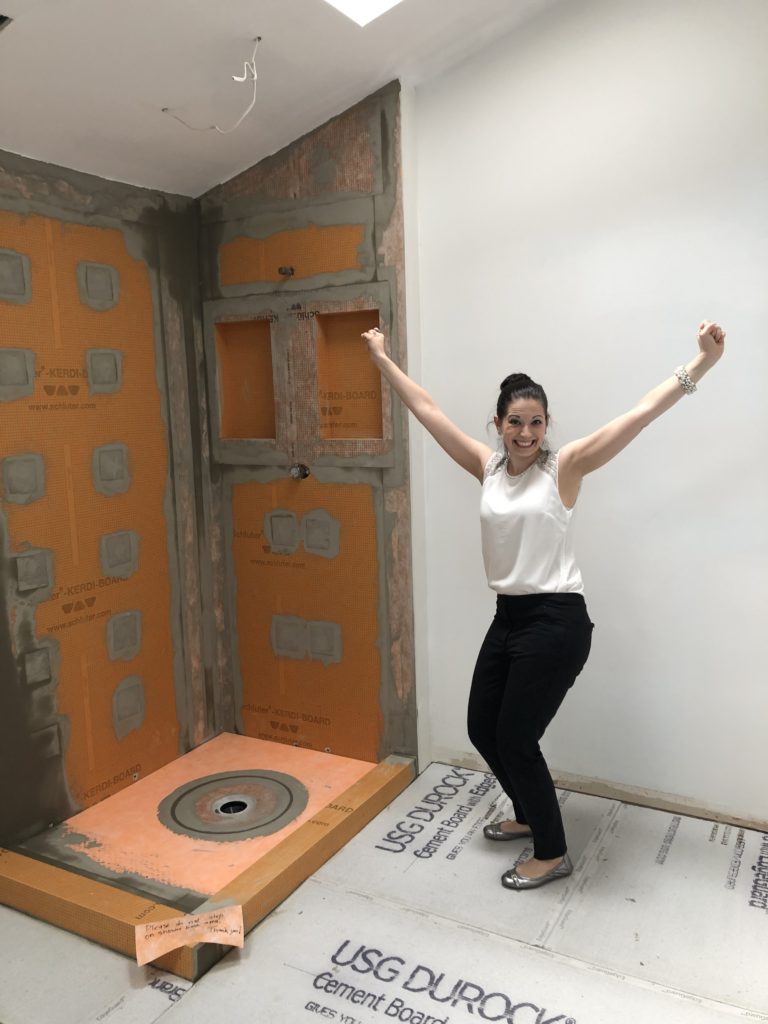
FINALLY the pretty starts! The floors go in first. I chose a classic basketweave tile because I really like it. Yes, I know – that’s a super deep answer, but it’s the truth! I love a classic, small-scale tile in a bathroom, so I went with a classic basketweave. This one is a black and white porcelain tile.
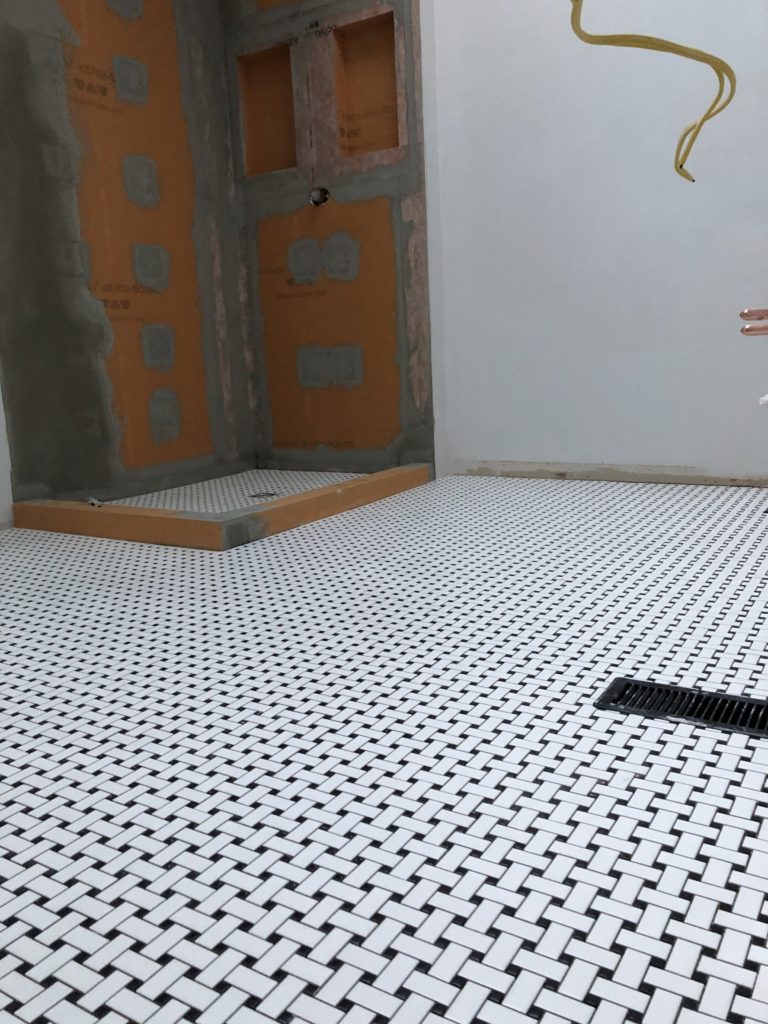
Why didn’t I go with the marble version? Two reasons: 1 – Cost. It’s WAY more expensive than porcelain, and I don’t have a magic money tree. I knew my custom wallpaper and herringbone tile shower were going to be pricey, so I had to dial back other aspects of the bathroom to stay in budget. And 2 – Marble is high-maintenance. I have a housekeeper who cleans our bathrooms every two weeks. Otherwise, we are not cleaning the floors. I’m the only high-maintenance thing in my house, and we all like it that way!
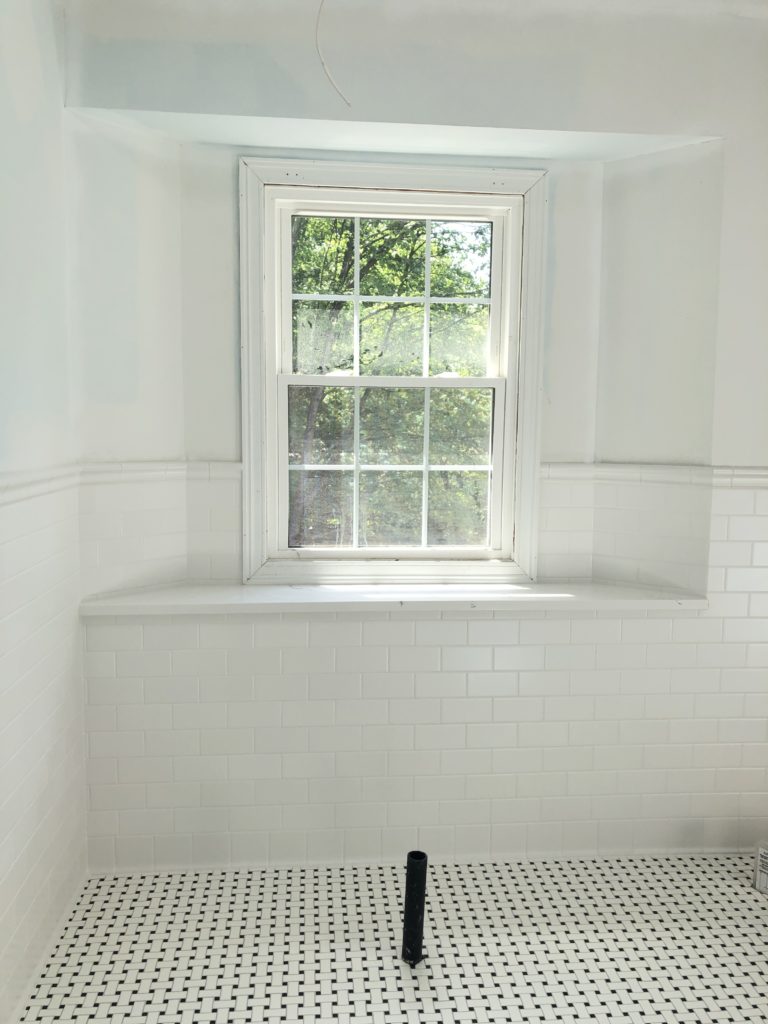
Then, the wall tile and window sill curb were installed. The wall tile is another nod to a classic bathroom. Most bathrooms used to have tile at least 3 feet up the walls, and you still see this in a lot of century homes.
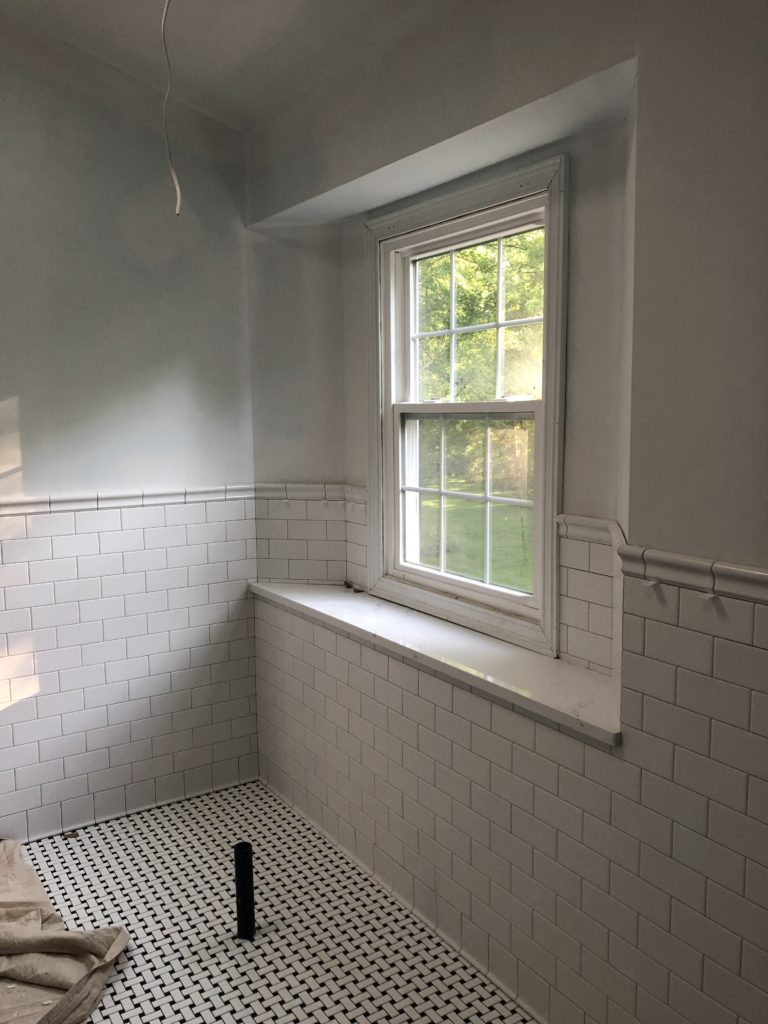
My home is a fake 80’s knockoff Colonial, but I still want to honor its classic roots. Plus, I like how it looks!
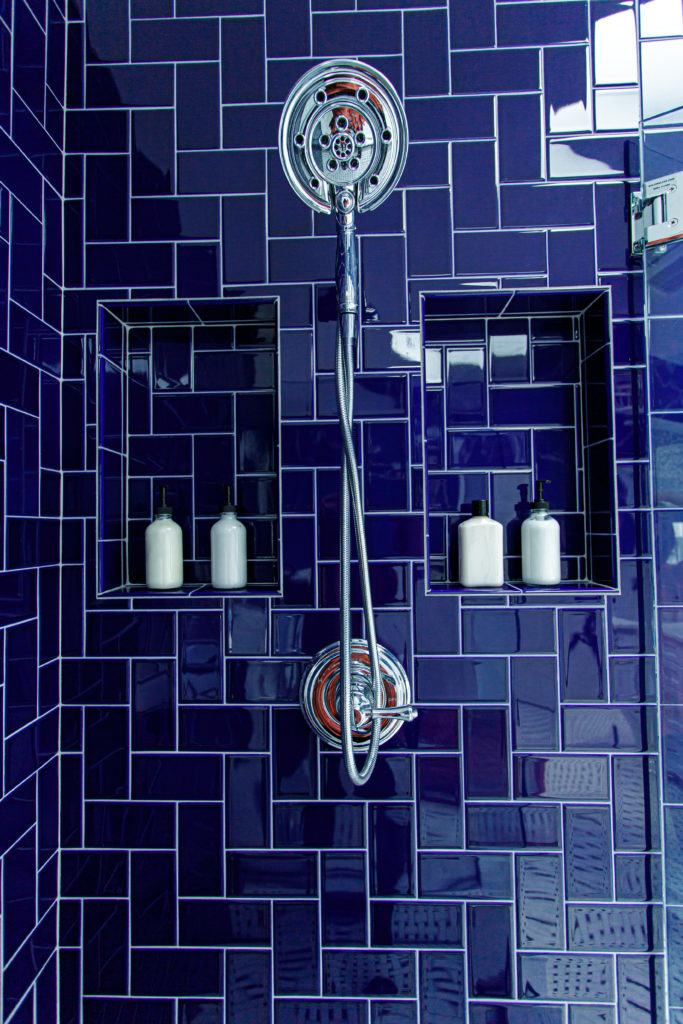
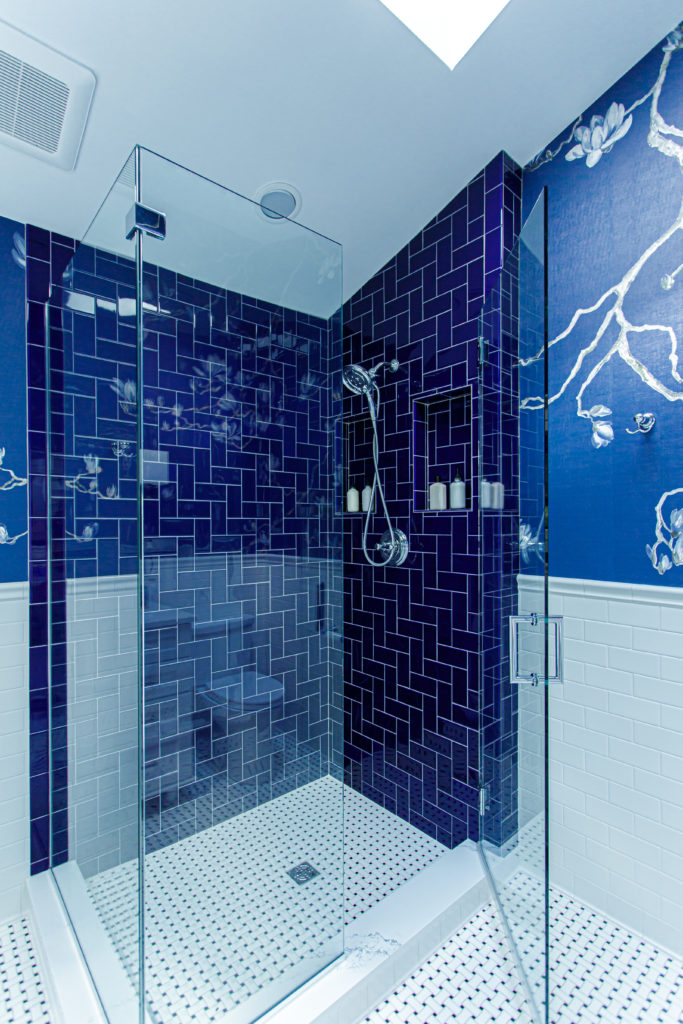
After that, the amazing tile guys worked their magic on my 90-degree herringbone shower.
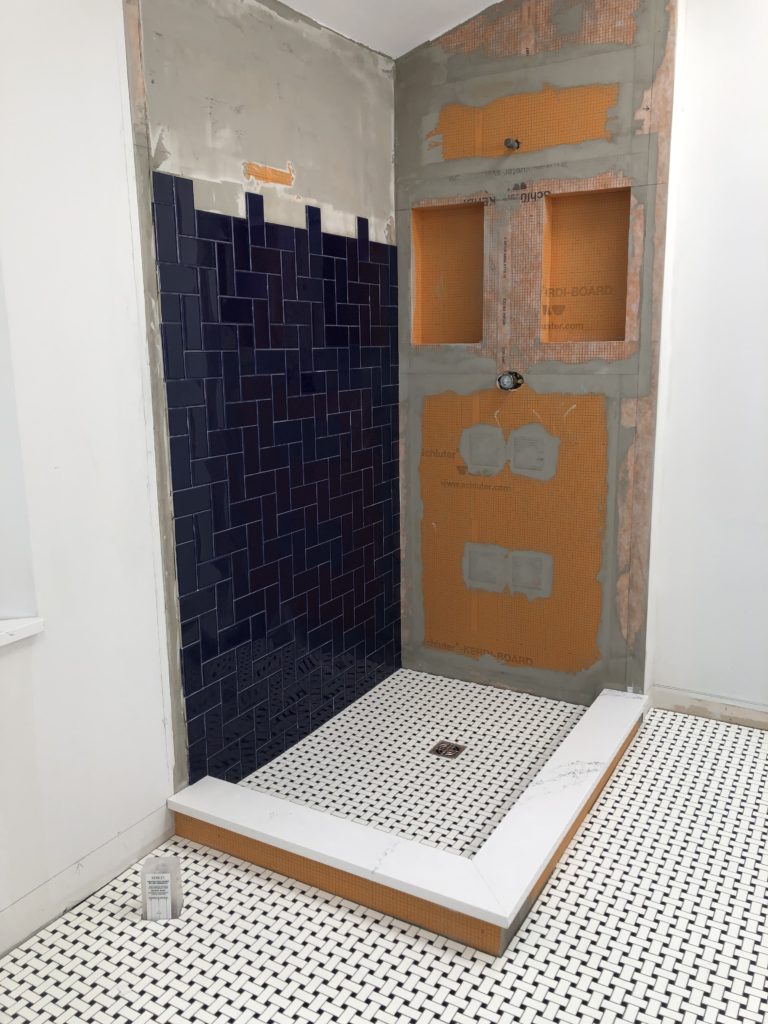
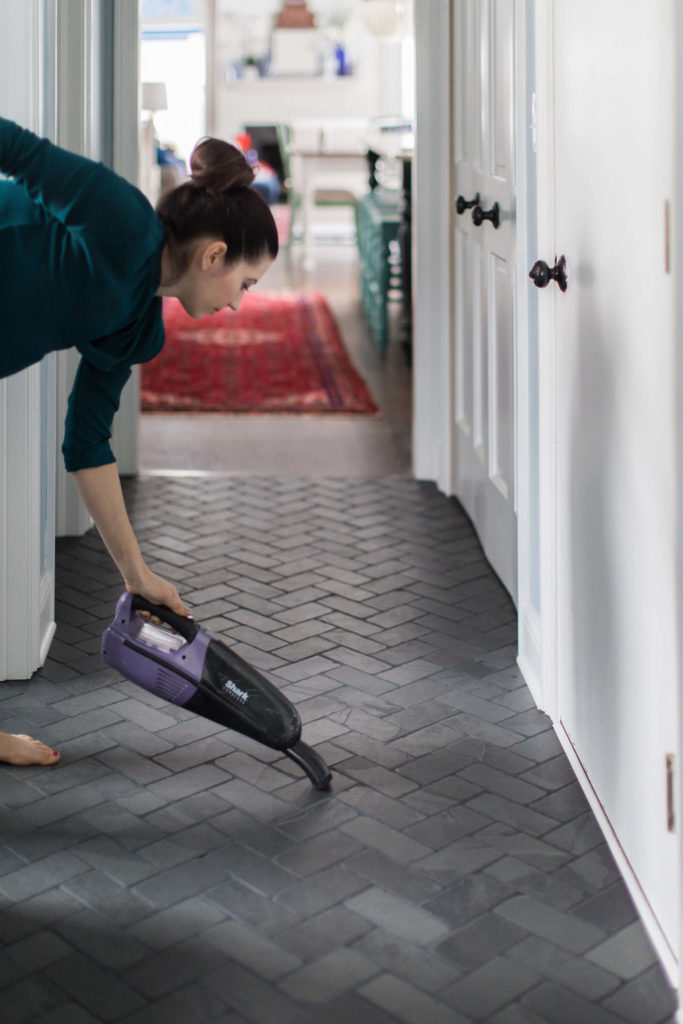
I love herringbone. The floors in my back hall are also herringbone, as is my fireplace surround.
Herringbone is a classic pattern that dates back hundreds of years. I love classic with a modern twist, so I chose to go with a blue tile (azure is the actual color name – so fancy!). And now, folks, I’ll be peppering in “after” photos for your enjoyment!

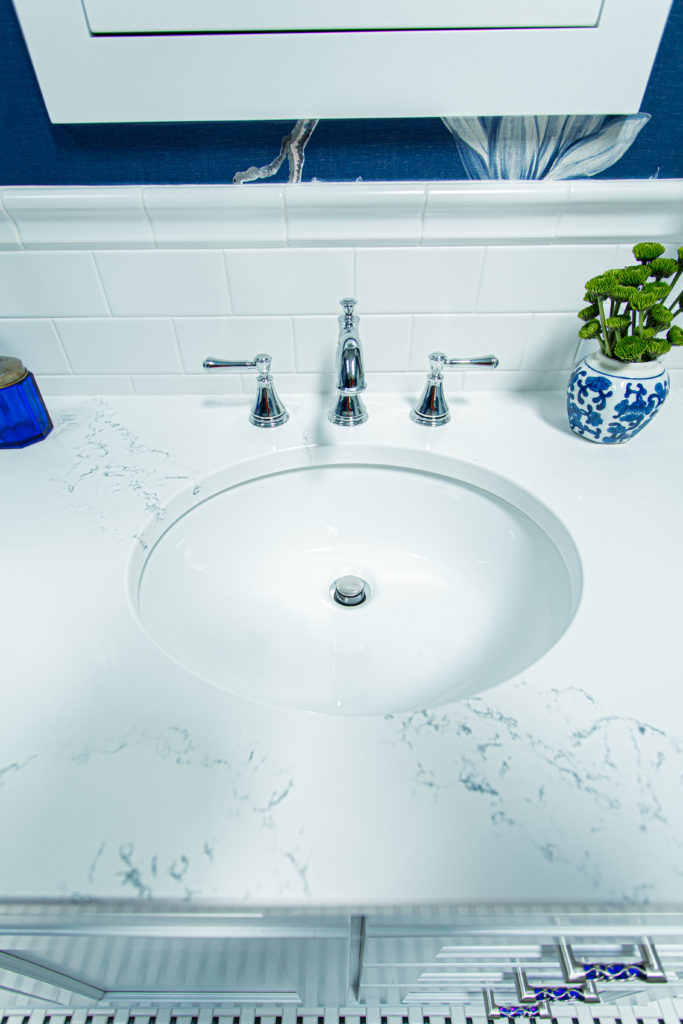
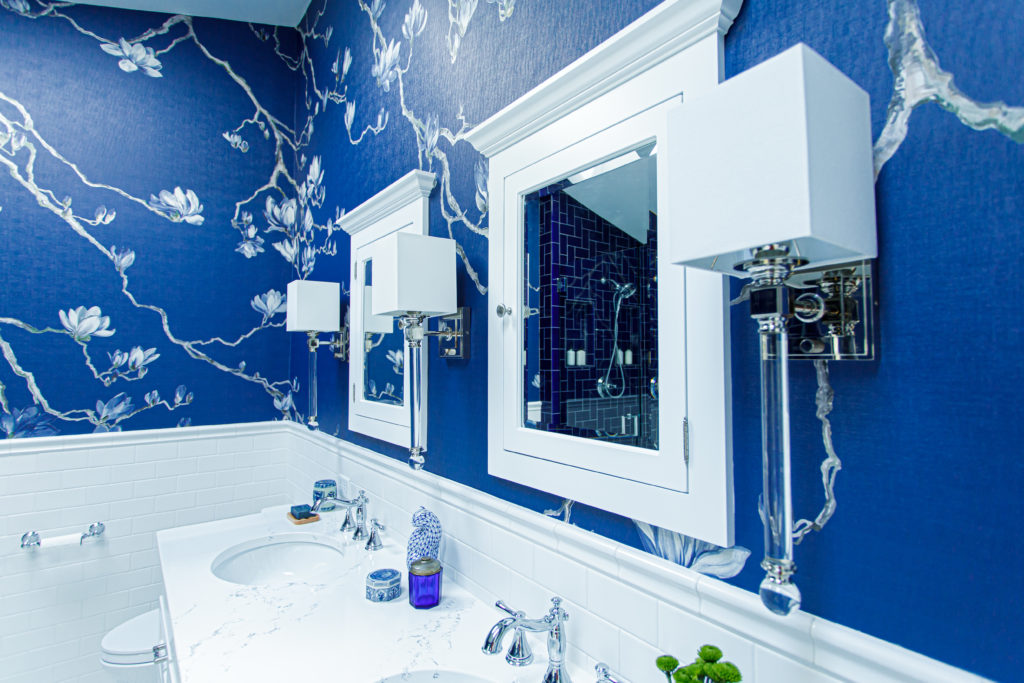
The vanity arrived, and the top was put on. I went with a white quartz with wavy veining that mimicked the movement in the wallpaper I chose.

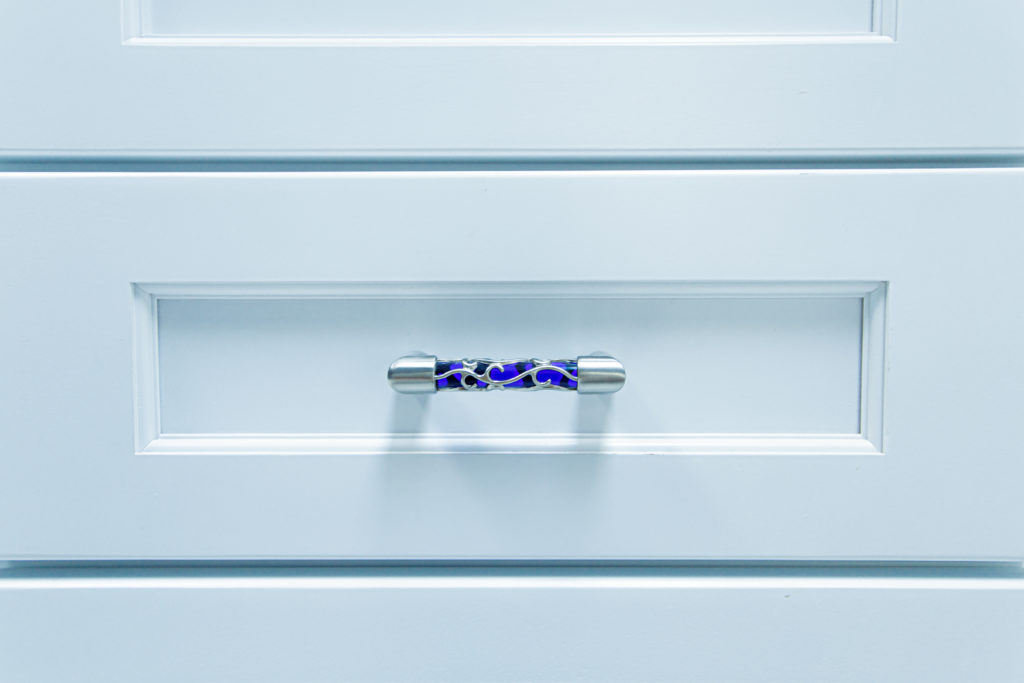
I also selected these fun cobalt pulls to coordinate with the cobalt shower tile!
I kept the plumbing really classic on purpose. I’m a sucker for an old timey faucet! Why did I go with chrome? Because it’s also very, very classic. And it costs less. Again, fancy wallpaper and lots of tile work meant I had to balance the budget elsewhere.


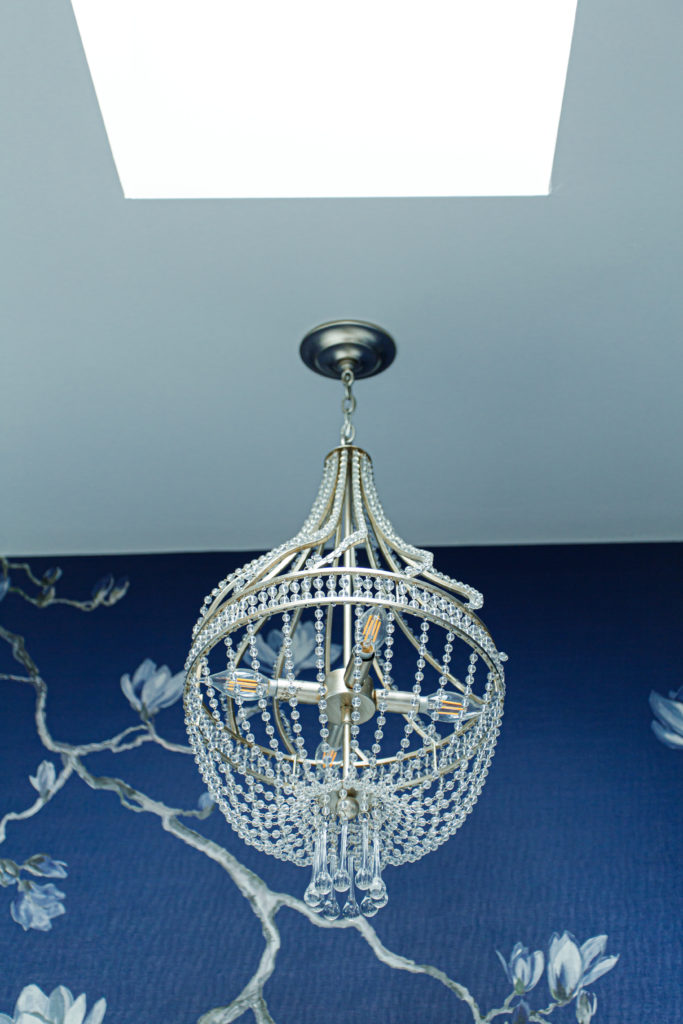
To balance out the classic plumbing, I brought in a more contemporary sconce and chandelier.
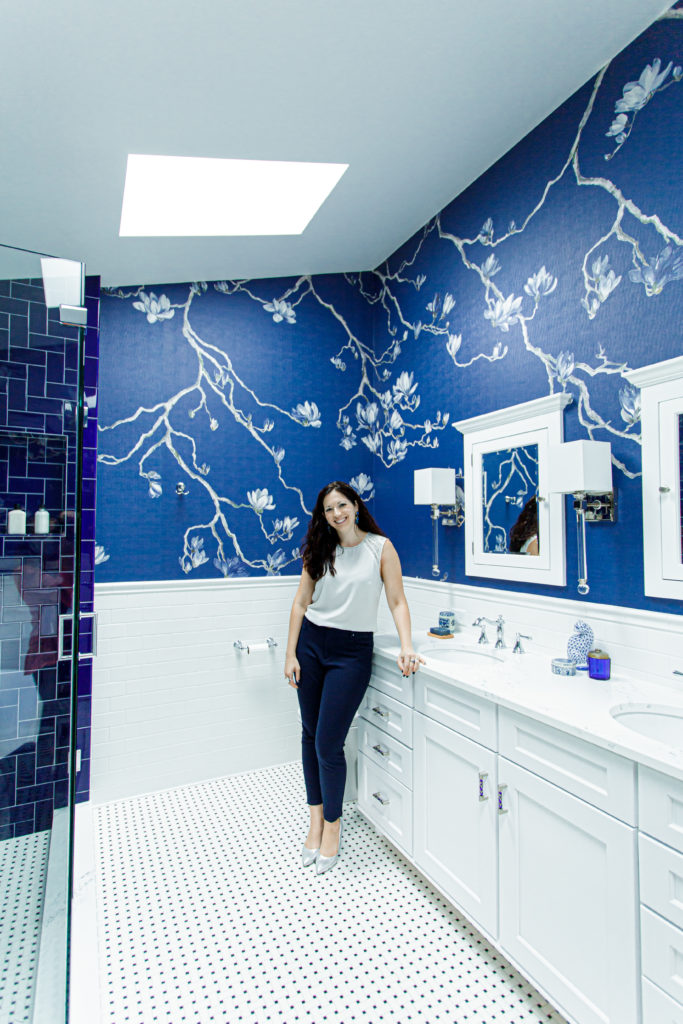
The tub and toilet went in next. I don’t have a gorgeous pic of the toilet…because it’s a toilet…but here’s a lovely one of the tub! (Yes, I am wearing clothes and no, I am not wet. My hair just covers up my sleeveless shirt.)

The seamless glass shower doors are one of my favorite parts of the room. Do you have any idea how much easier they are to keep clean than a nasty shower track? We just squeegie them down after a shower and voila – they stay nice and squeaky clean!
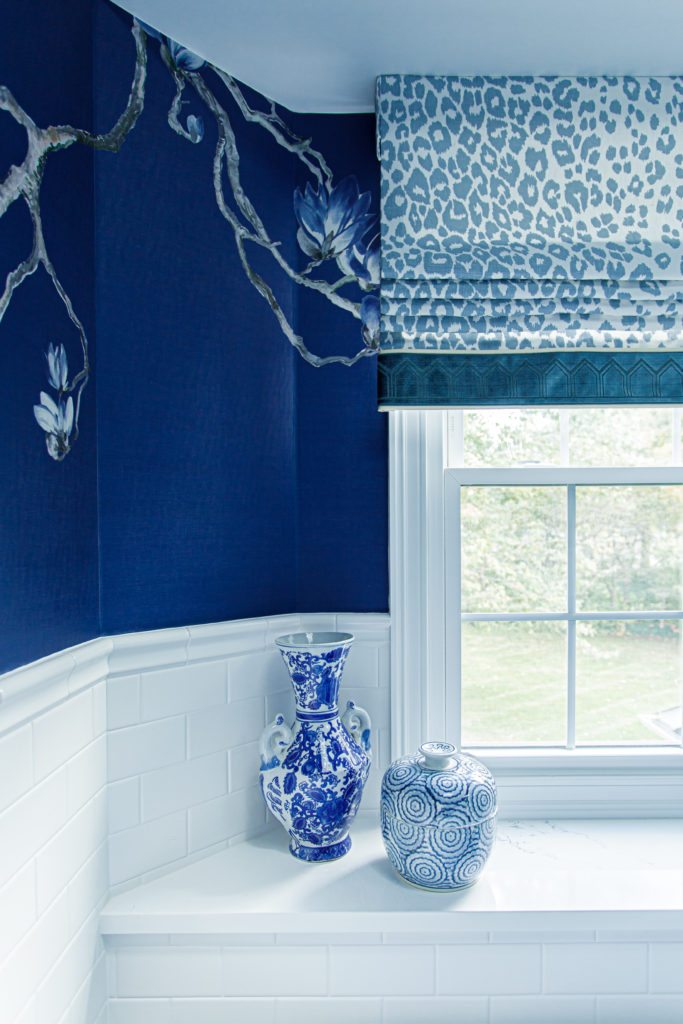
And last but certainly not least, the ceiling and woodwork was painted, and my wonderful wallpaper installer put up my custom Phillip Jeffries wallpaper.
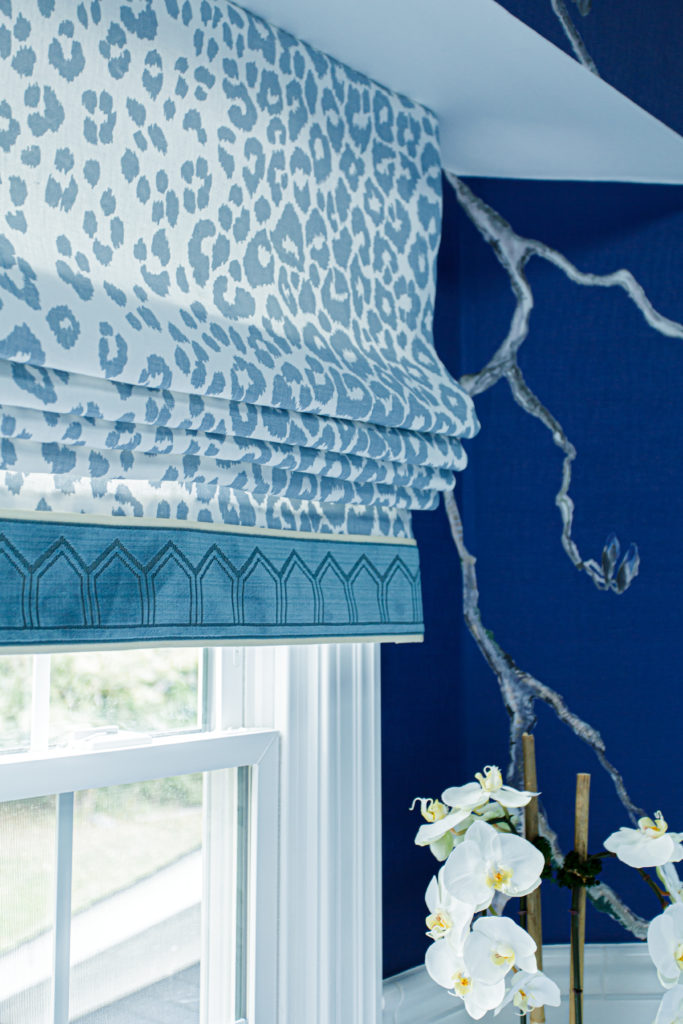
I chose a fun and unexpected Schumacher cheetah print for the roman shade, with a pretty velvet trim. (I’m really into trimming out romans – it just adds that extra flair!)
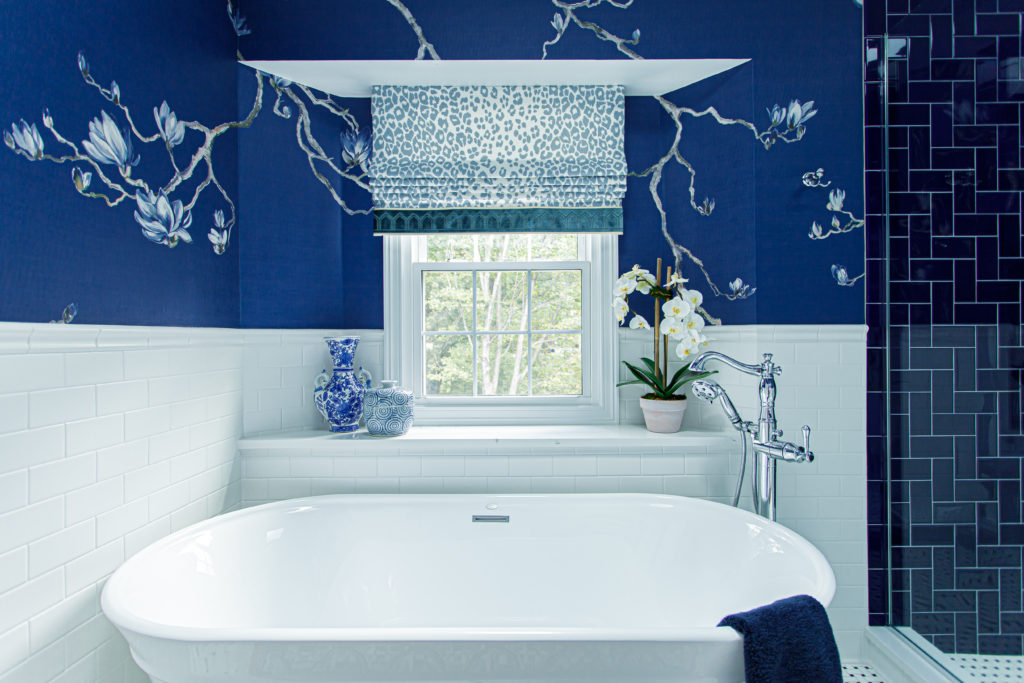
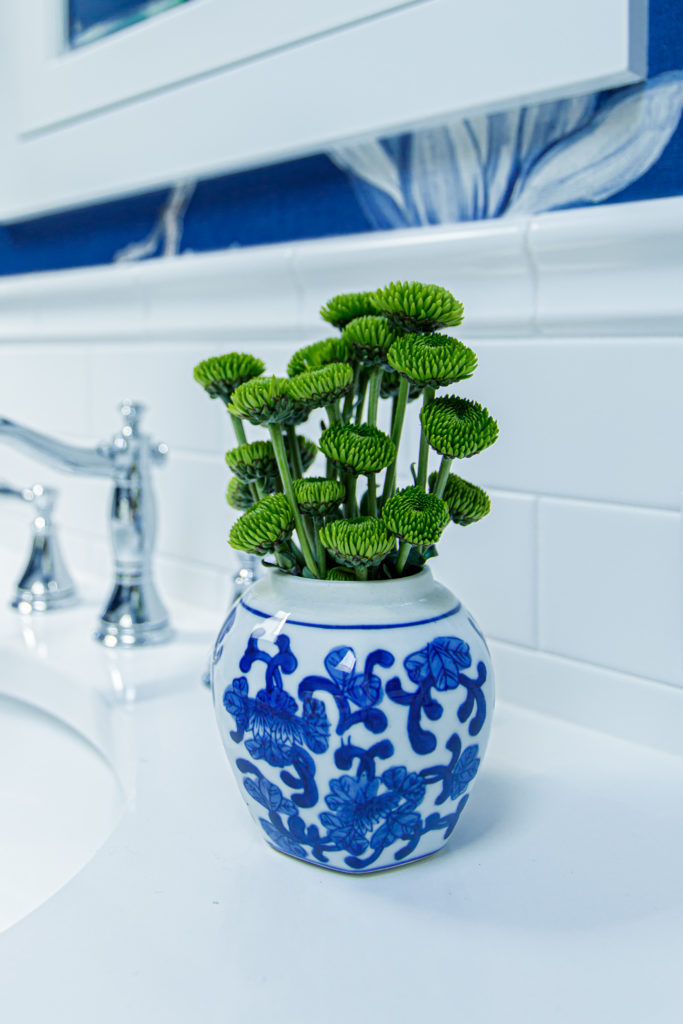
And of course, no room of mine is complete without some vintage accessories!
The wonderful team of contractors from Anthony Slabaugh Remodeling & Design did magnificent work on my bathroom. They’re an absolute joy to work with, and I highly recommend them to anyone within the greater Hudson, OH area! (No, they don’t pay me to say this. I say what I want. If you haven’t figured that out by now…go read some more of my blogs or give me a call and ask me a question!)
Needless to say, I’m thrilled with how my bathroom ended up. The best part? I can wash my hair without bruising my elbows. It’s pretty magical.
Need some help with your bathroom? Book a Discovery Call with me and we can chat about your project!


susan dowdy
| 11 August 2021Amazing tips! I think most of the people did not know about it. Thanks for sharing such nice tips! I really love this blog and content is really useful. Thanks for telling us about the importance of solvency. Keep sharing this post more and more.
The DIY are very well made, extremely informative and the directions are easy to follow.
lindsey
| 16 August 2021Thank you, Susan!
Katherine
| 21 February 2023Great bathroom! What grout color did you use with the basketweave tile?
lindsey
| 21 February 2023Thank you, Katherine! It’s a light/medium gray with blue undertones that worked well with the wallpaper and blue subway tile. I don’t remember the name offhand, sorry! The exact color that’s right for your project will depend on the other elements in the space 🙂 For example, if we’d have gone with taupe walls, we probably would have selected a more taupe colored grout.