Pink brick. If you live in a house built in the 1980’s or 1990’s, chance are, you’ve got a fireplace with at least a little pink brick on it. Pink was a HOT color in the 80’s, but just like with any trendy color, it’s now rather dated 30 years later. (And yes – same goes for the brown brick of the 1970’s and the yellow brick of the 1960’s and the gray washed brick of the 2010’s – that’ll be dated too…)
Anyhow, here’s what my pink brick fireplace looked like when we moved in. The woodwork was also cherry, which made the whole room really dark. And ignore the bad styling – I had a 15-month-old and no time to decorate my own house.

Here’s another less-than-stellar photo of my fireplace.

The first thing we tackled was the cherry woodwork. For our house, this was the only room with cherry woodwork in the whole downstairs. The rest was painted already. The cherry didn’t jive with the walnut ceiling beams, and it really did suck the light out of this already-dark room.

Here’s what the fireplace looks like painted. Way brighter, but man – now the pink brick stuck out even more than it did when the fireplace was dark cherry!
The super dirty fireplace interior wasn’t doing the overall look any favors either. So I scrubbed the crap out of the interior and then had it painted with heat-resistant paint.

That’s better. Kind of. I still didn’t like the pink brick.
It certainly doesn’t help that my color scheme is blue and red. The muted pinks REALLY don’t flow well with the intense reds and blues in this room. And I love me some intense color.
So what to do? I decided to reface the brick. (Oh, and I also decided to rip out the carpet and put in solid hardwood to coordinate with the adjacent kitchen, so if you suddenly see hardwood in the subsequent photos, that’s why!)
After deciding to reface, I had to choose a material to actually reface the fireplace with. There are so many wonderful options out there – granite, quartz, porcelain tile, glass tile – the possibilities are nearly endless. For my fireplace, though, the decision was pretty easy. I had leftover slate from a floor project I’d had done earlier in the year. Here’s what that floor looks like:

This was a pricey material and I didn’t want it to go to waste. Using the slate for the fireplace made economic sense, plus it tied the fireplace and the slate floor together nicely!
Like any small tile-ish material, I had to decide on the layout. Below, you see the 90-degree herringbone pattern I decided on for the hearth.

I love 90-degree herringbone because it’s visually interesting but requires WAY less cuts than traditional herringbone. For a small space with limited material available, 90-degree is the way to go! I could have also gone with a traditional brick pattern, but I just love me some herringbone. It’s a classic pattern that will not look outdated.
Refacing the brick is WAY more cost effective than ripping out the existing brick. Refacing entails putting a new layer of material over the existing brick. Brick is actually a pretty darn good foundation layer for most other materials. It’s solid and strong. Yes, it has dips where the mortar is, but that can easily be filled in and flattened. Here’s what the fireplace looked like with the first layer of “flattener” applied.

Then, another darker layer had to be applied over that.

After that, the actual tile work started.

My cats were very curious about what was going on. Mostly, this one really wanted to eat that roll of paper towels.
Here’s a progress shot of the vertical surface:

To make sure the heavy slate tile stays in place, my contractor used wood supports. This is crucial so the tile doesn’t slide down while drying.
Here’s a shot of the finished fireplace. As you can see, the new slate tile is applied directly over the old pink brick. Since we also got rid of the carpet and laid hardwood, there was now an unsightly border around the mantel.

A nice molding stained the same color as the floors makes a huge difference!

Here’s the finished product:

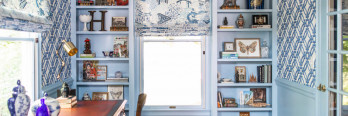
And the finished room:

Buh bye, pink brick! Hello, light and bright room! I used to hate my family room, and now it’s by far one of my favorite rooms in my house.
Are you thinking of a fireplace redo?